When something does not work as you expect, or you cannot find how to do it, ask our team in a support request. You write it from your account, you can add screenshots, and every answer arrives in the same place — with a notice in the web app and an e-mail each time.
What you need: an account, and a few words about what happened. For a quick question the chat is faster: see How to get answers in the chat.
The pictures are from the product. The people in them were made up for the pictures.
Step 1: Open Support
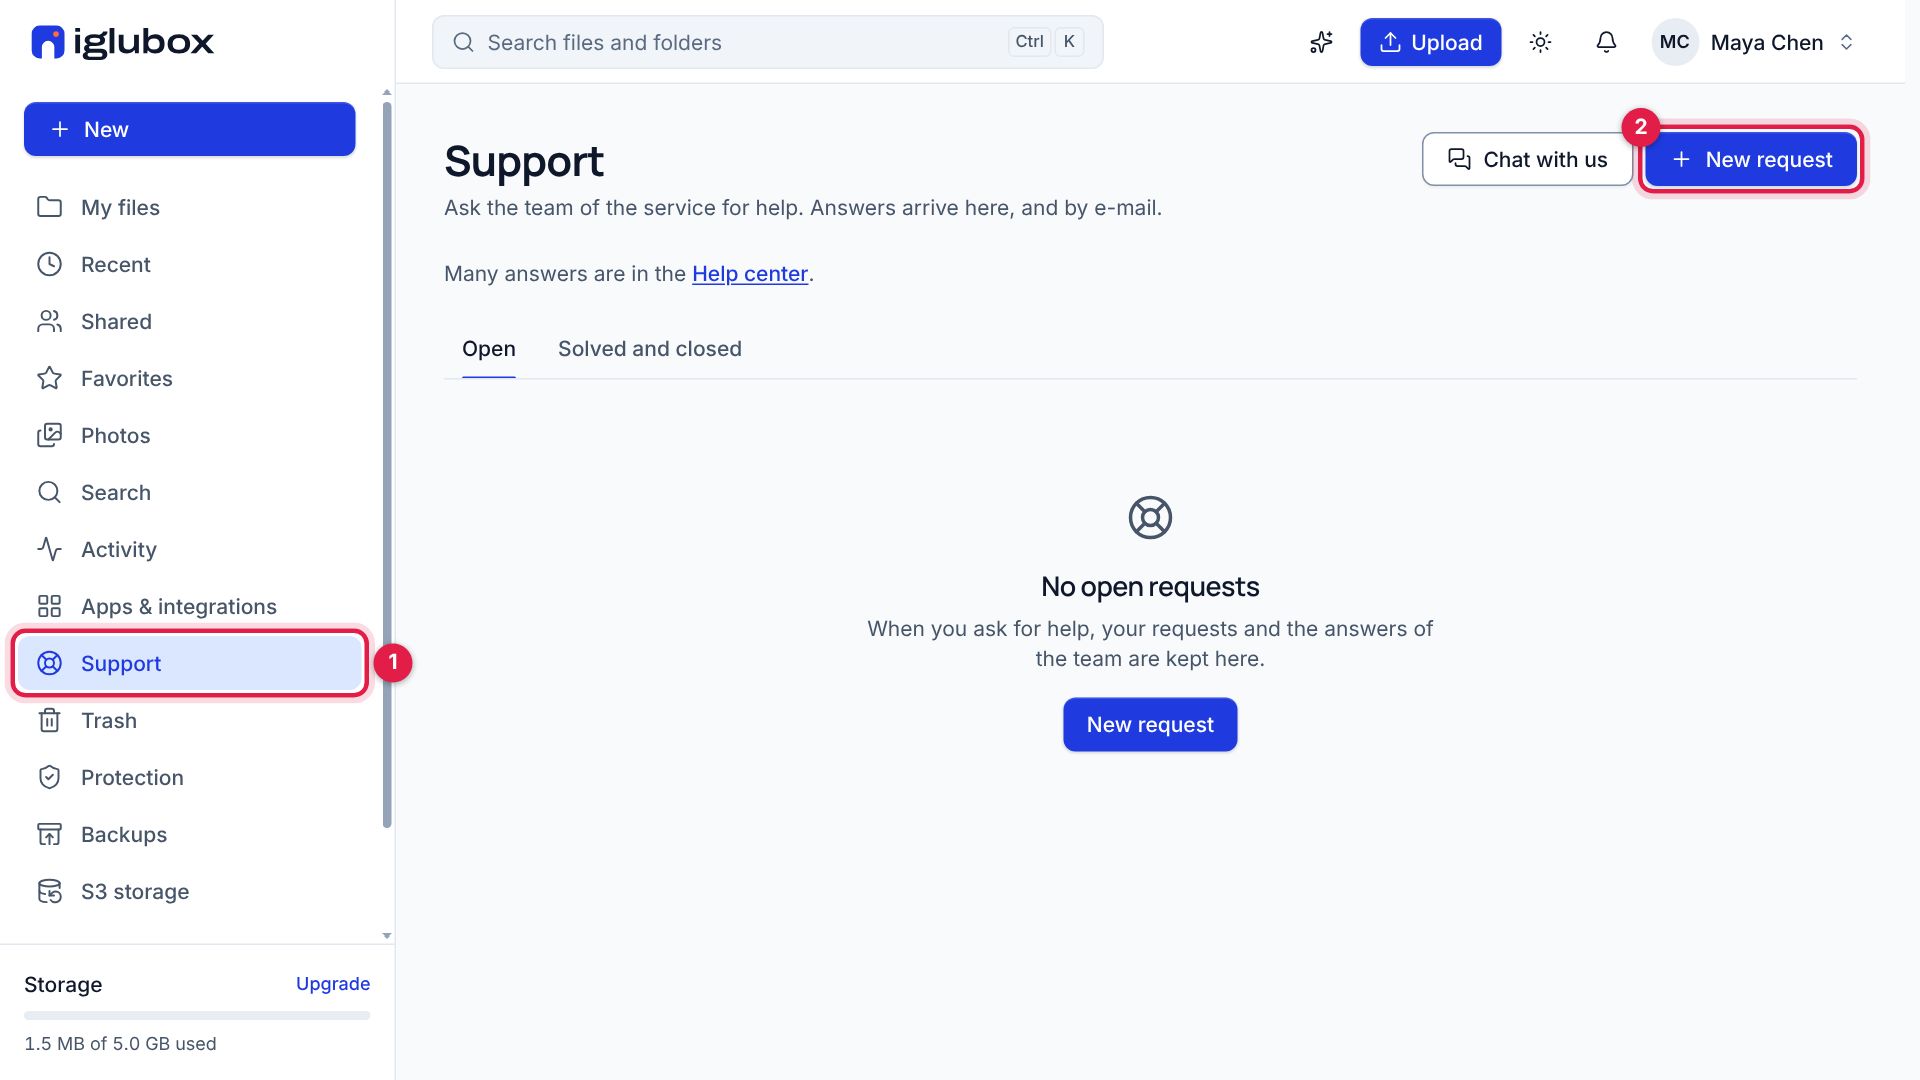
In the web app, choose Support in the sidebar (1). The page lists your requests, the open ones first. Choose New request (2).
The desktop app leads to the same page from Settings → Account → Ask for help, and the phone app from Settings → About → Support requests.
Step 2: Say what happened
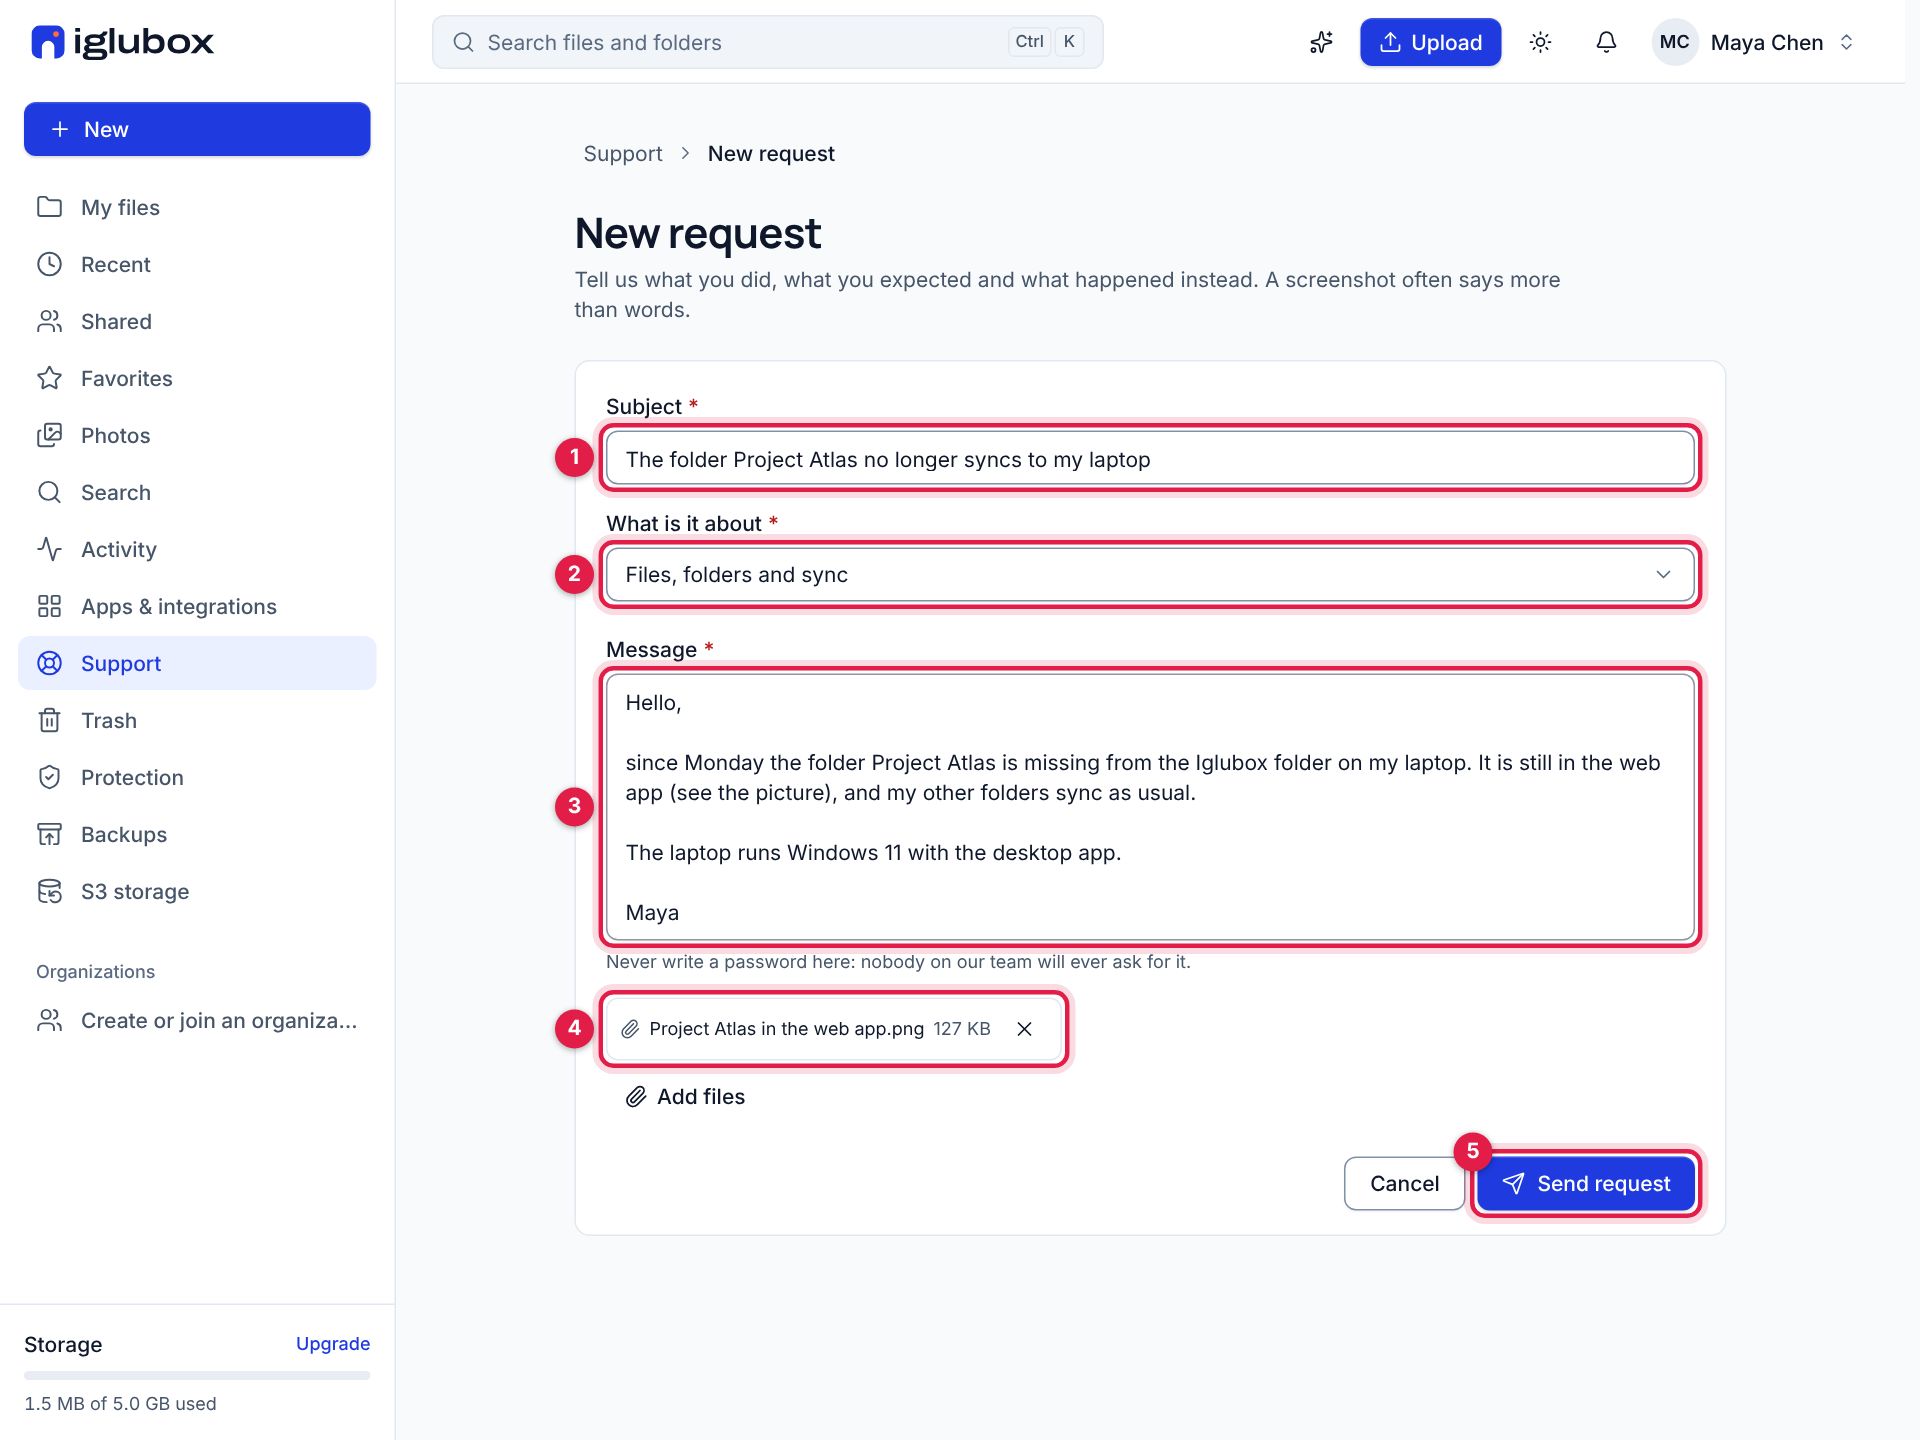
- Subject (1): a line that says what it is about.
- What is it about (2): your account, your plan and invoices, files and sync, sharing, the apps, security, or something else.
- Message (3): what you did, what you expected and what happened instead. The more exact, the faster the answer.
- Files (4): up to five — a screenshot, a short recording, a file that does not open. Drop them on the form, paste a picture, or choose Add files. Each one uploads at once and shows its progress.
Then choose Send request (5).
Never write a password in a request. Nobody of our team will ever ask for it.
Step 3: Your request has a number
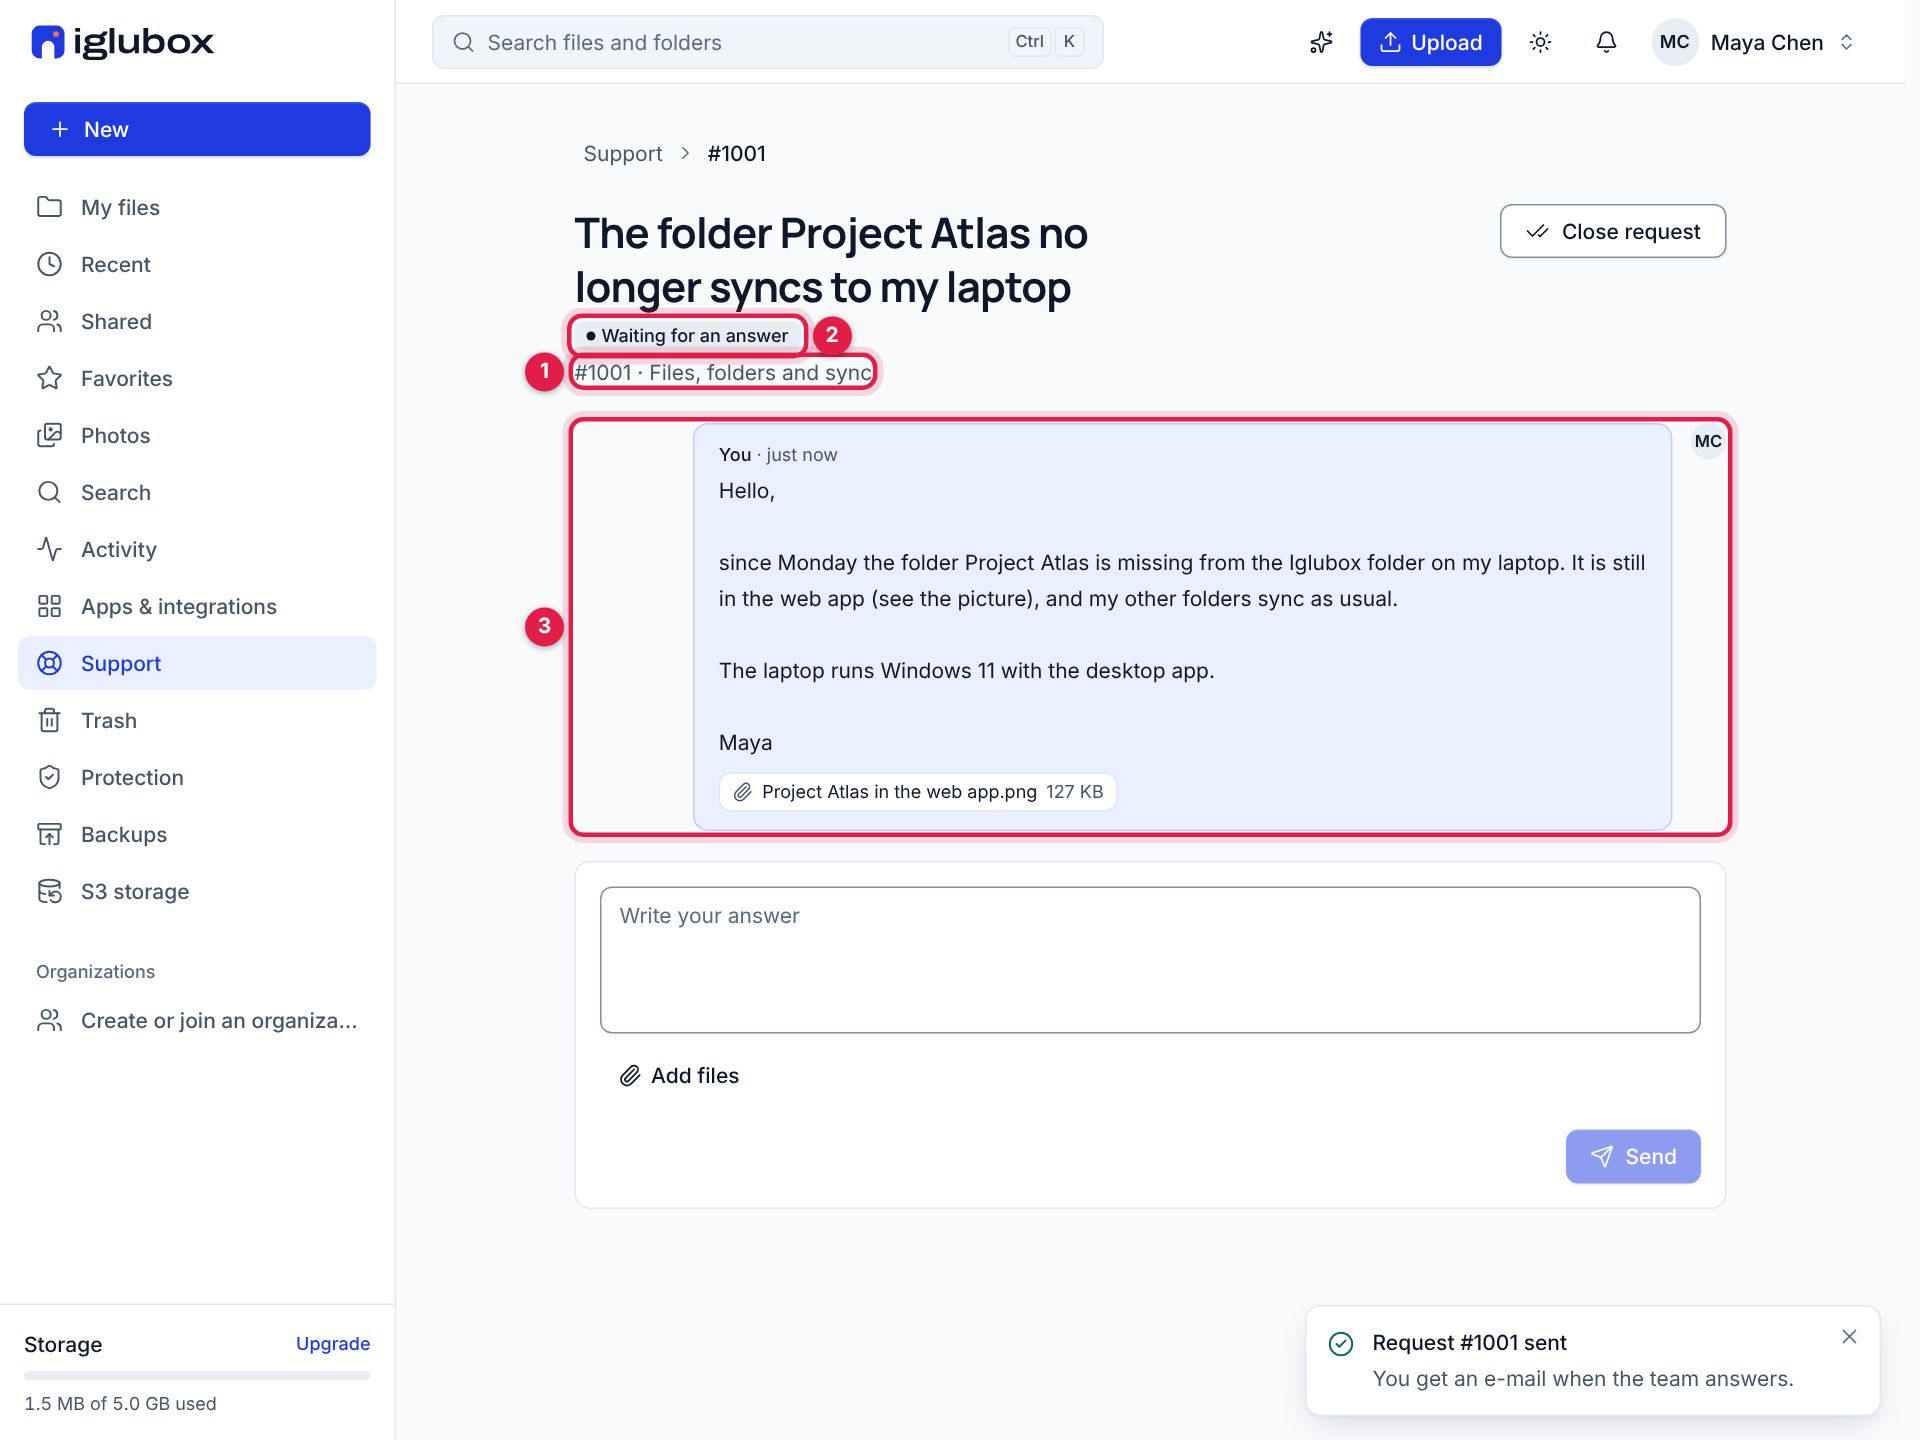
The request opens at once with its number (1) and its state (2): Waiting for an answer means it is our turn. Your message is there with its files (3), and an e-mail confirms the number.
Step 4: The answer arrives
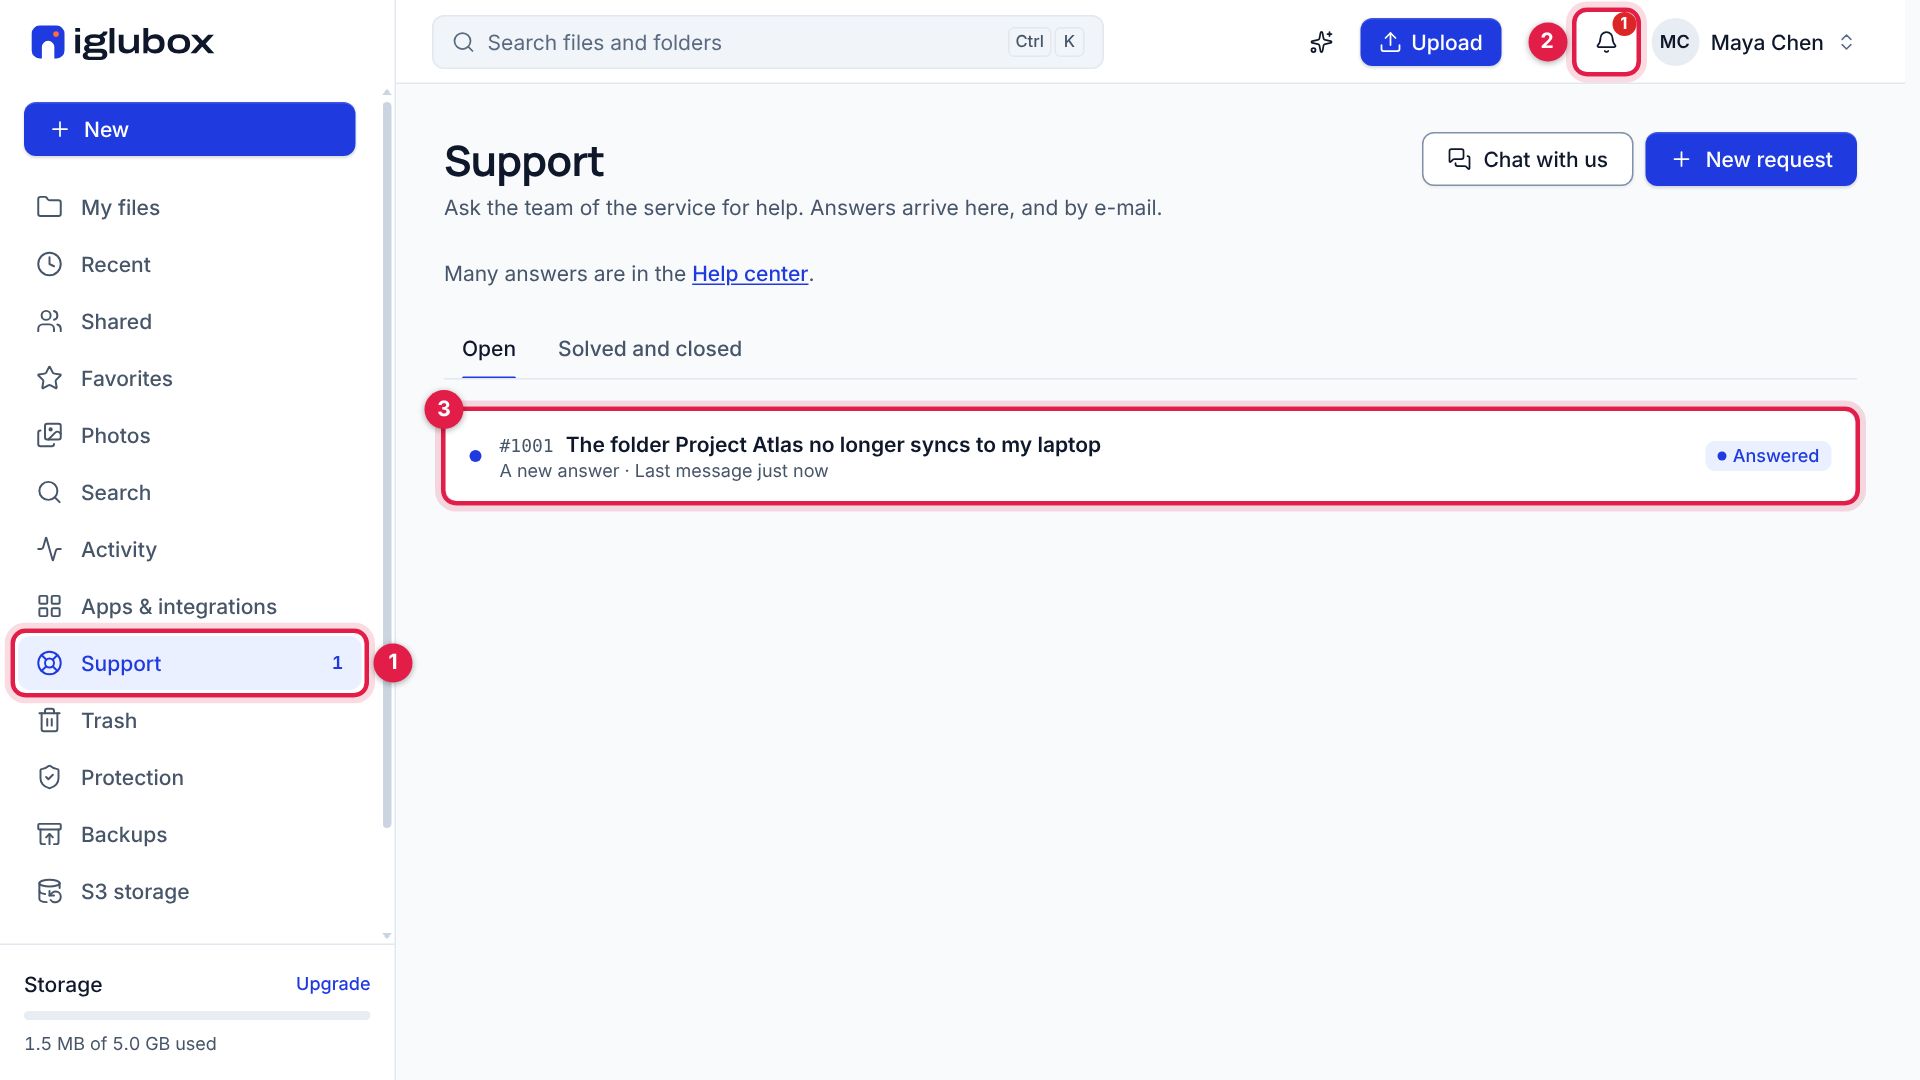
When the team answers, Support in the sidebar counts the requests with a new answer (1), the bell at the top shows a notification (2), and the request is marked in your list (3). You get the answer by e-mail too, with a link to the request.
Step 5: Read it and answer
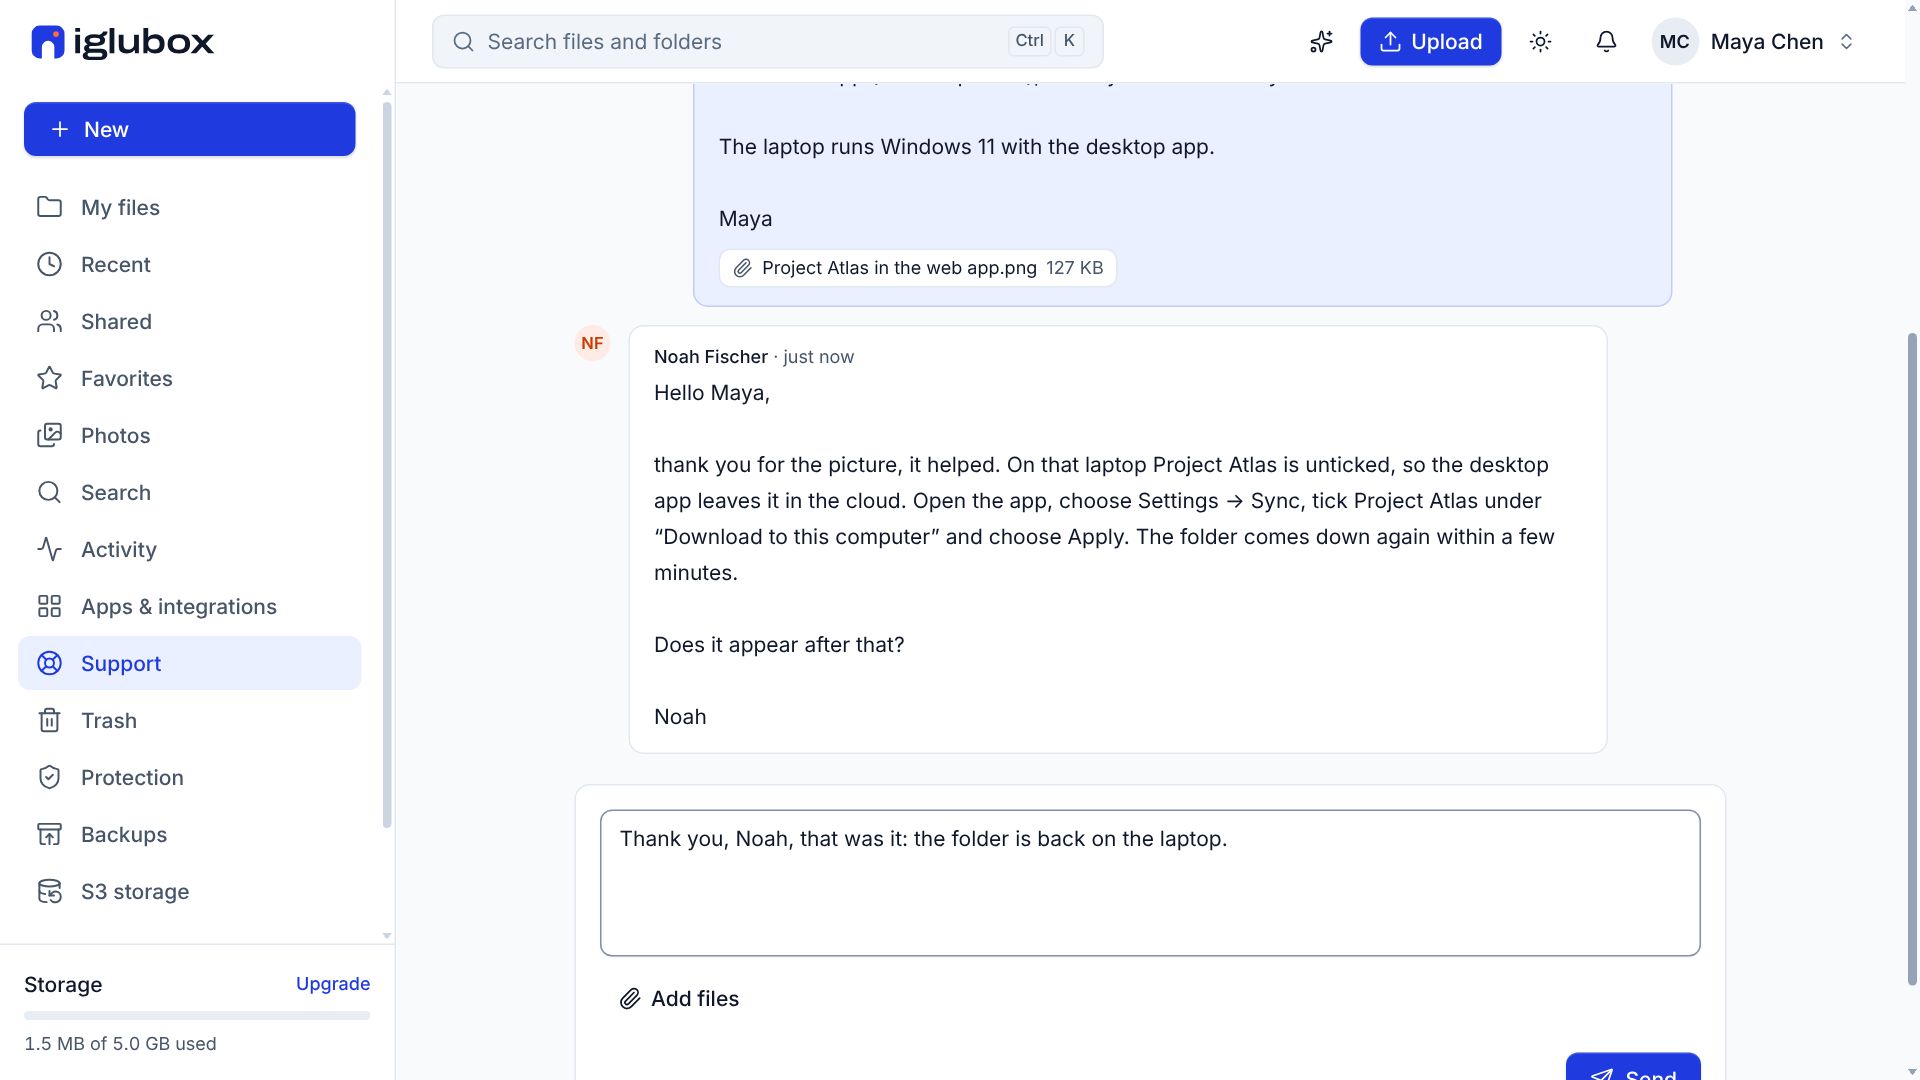
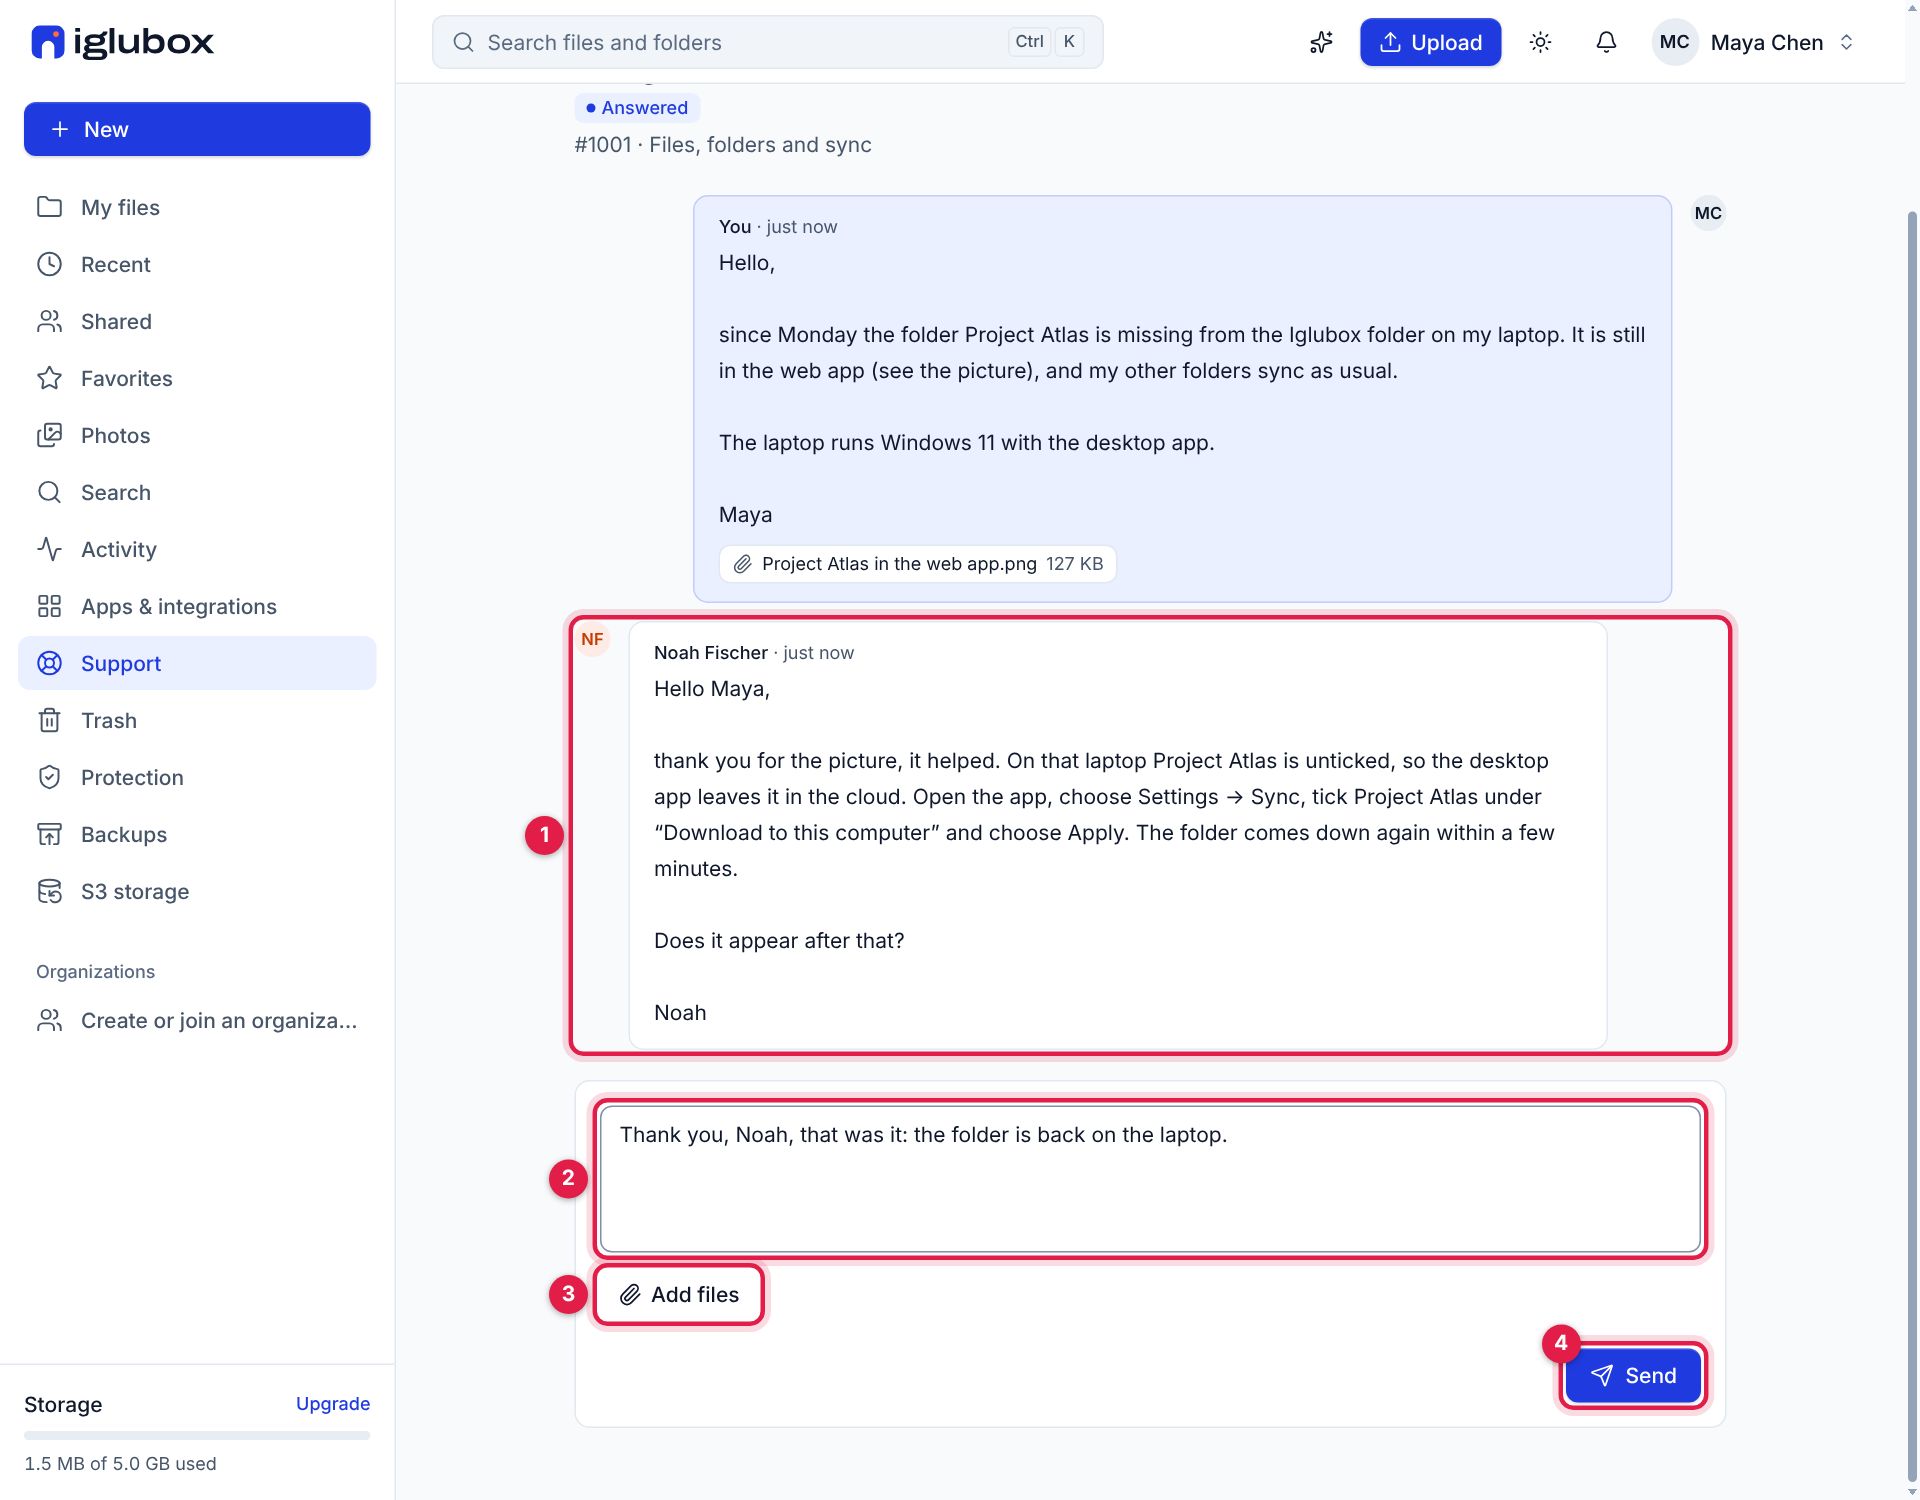
Open the request. The answer of the team is on the left, with the name of who wrote it (1); your messages are on the right. Its state is now Answered: your turn.
Write in the box under the messages (2), add files if you need to (3), and choose Send (4).
Step 6: Solved, closed — or open it again
When the team marks the request Solved (1), the page says so (3). Choose Close request (2) if all is well. If something is still missing, simply answer: the request opens again.
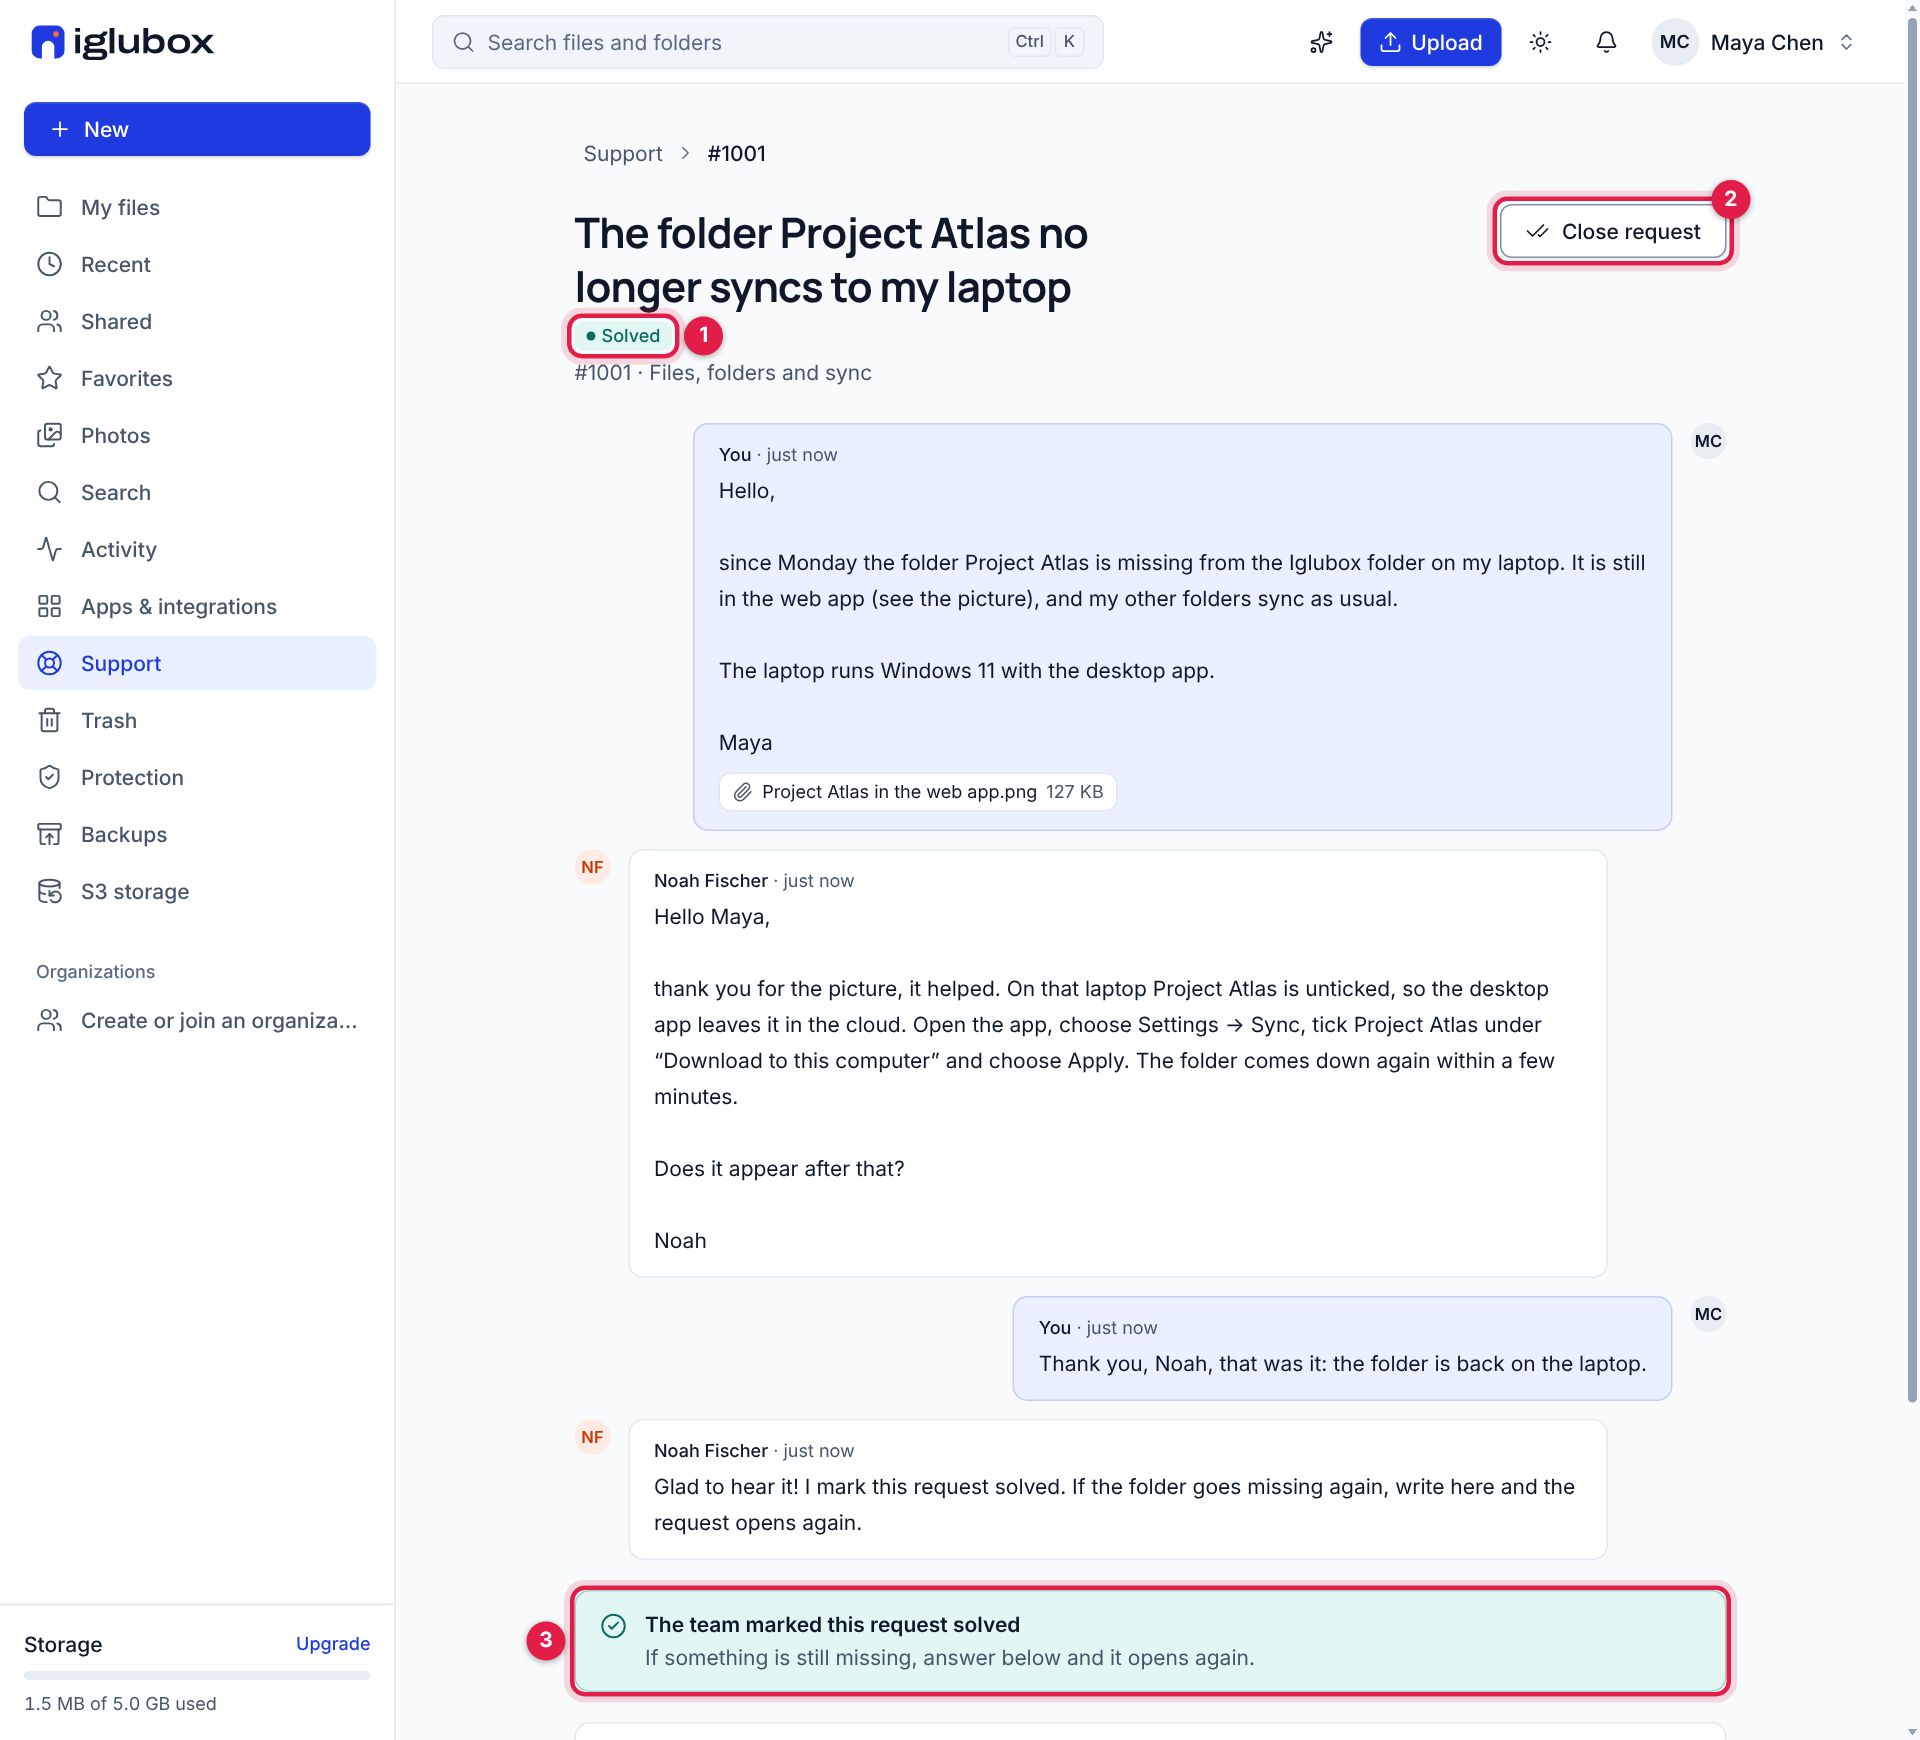
A closed request stays in your list under Solved and closed, and Open it again brings it back if the same thing happens later.
Good to know
- Without an account, the contact form of the website opens a request too. The page tells you its number, and the e-mails you get carry a private link where you read the answers and write back. Keep that link to yourself.
- Who reads it: the team of this service. Files you add are checked for malware like every upload.
- How long it is kept: as long as your account, unless the service removes closed requests after a time. The export of your account contains your requests.
The help center has the short version: ask for help with a support request.