A contract, an offer, a consent form: when a document needs other people’s signatures, you can send it from your files and get the signed copy back in the same folder. The people who sign need no account and nothing to install.
What you need: the document in your files — a PDF, or an office document such as a Word file — and the names and e-mail addresses of the people who sign. Signature requests are part of the plans that include them; if yours does not, the first screen says so.
The pictures are from the product. The people and the agreement in them were made up for the pictures.
Step 1: Choose the document
Open the folder with the document and open its menu: the three dots at the end of its row, or a right-click on it. Choose Request signatures… in that menu.
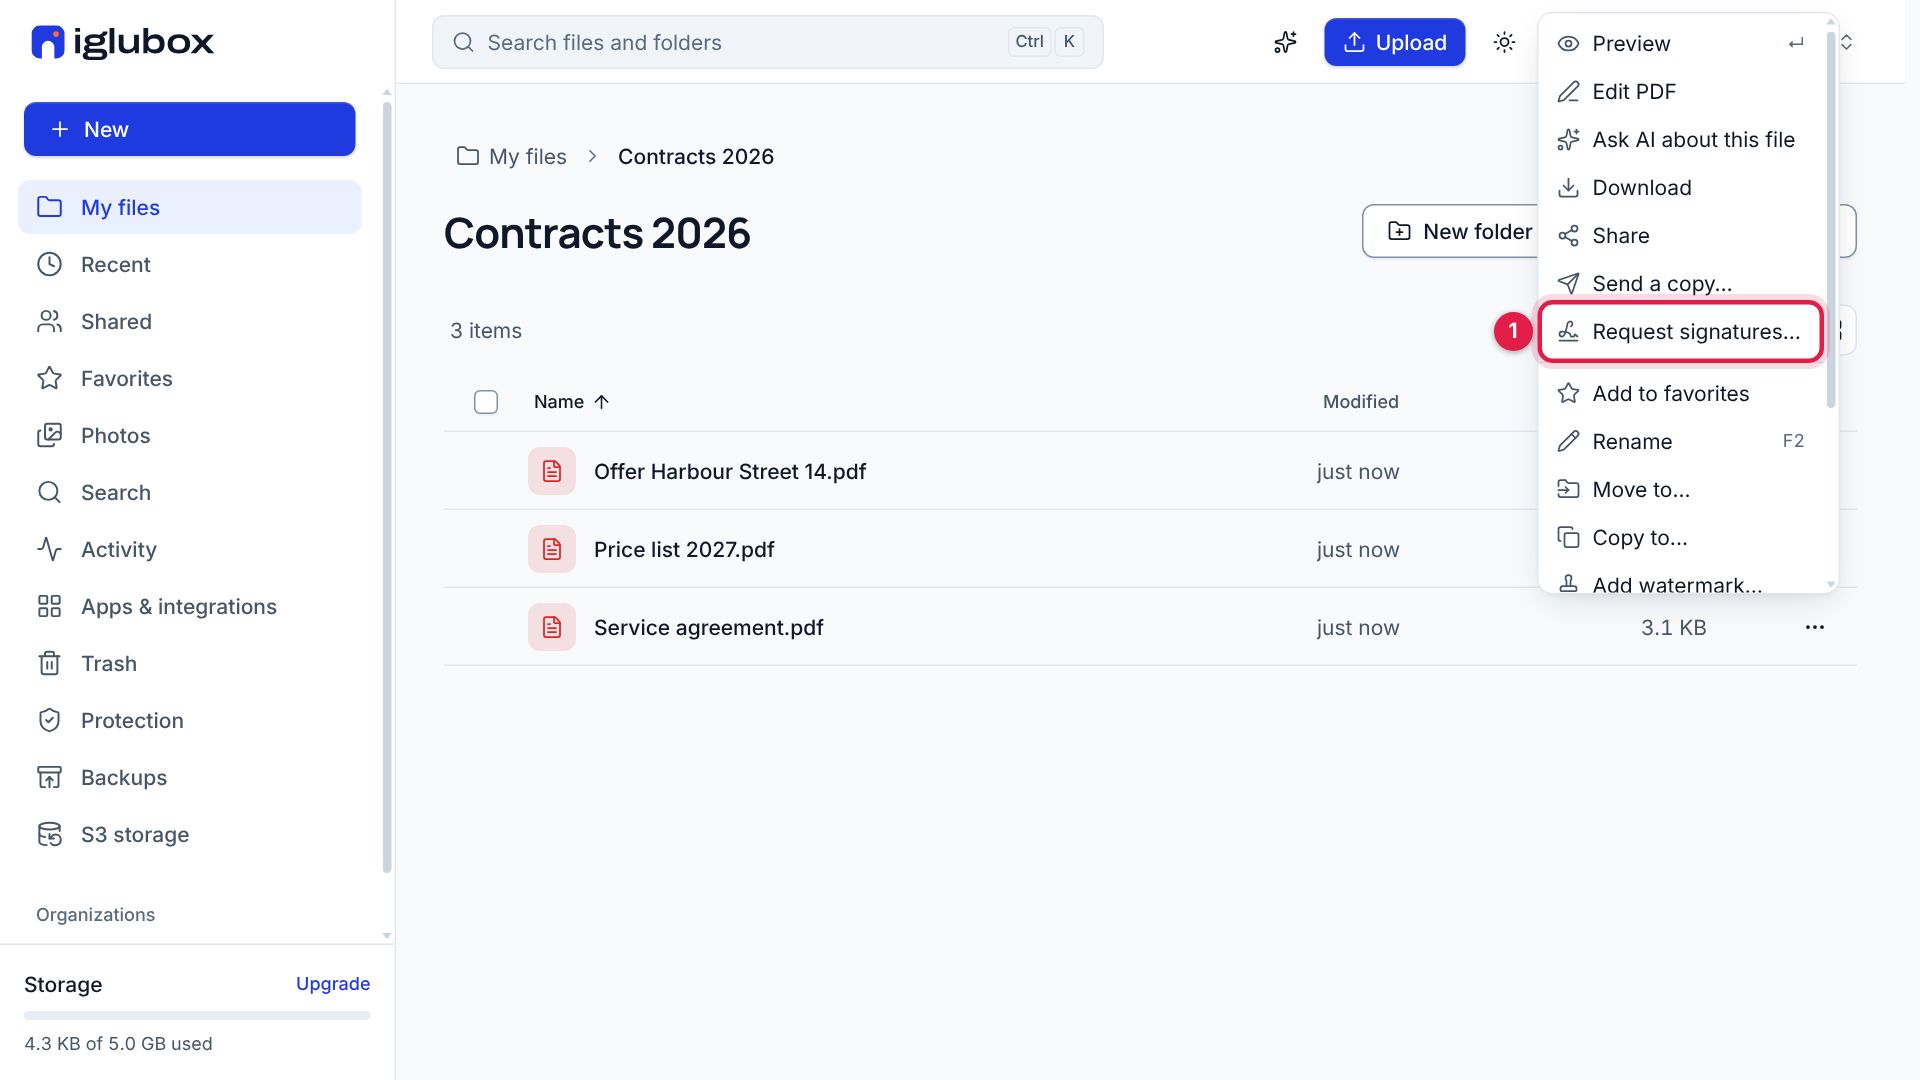
An office document is turned into a PDF first. What your signers see and sign is that PDF, exactly as the next screen shows it.
Step 2: Say who signs
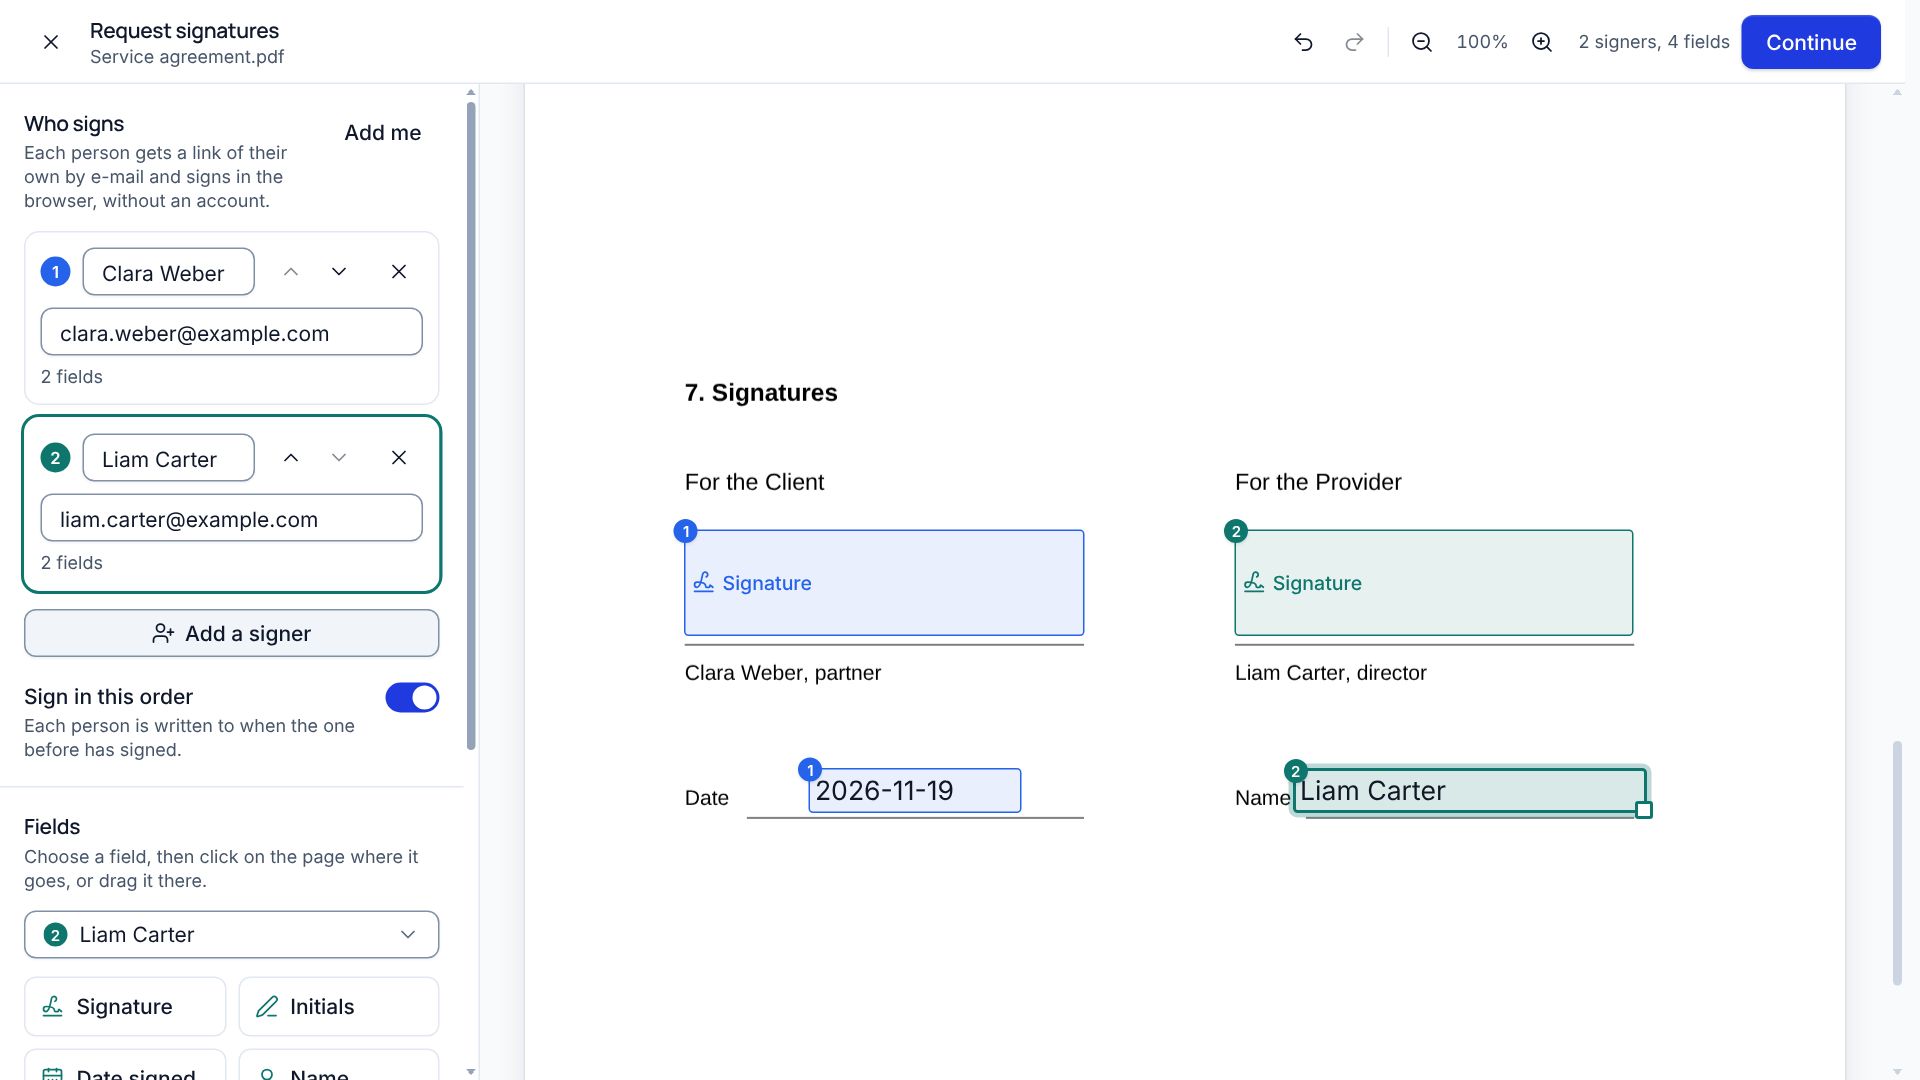
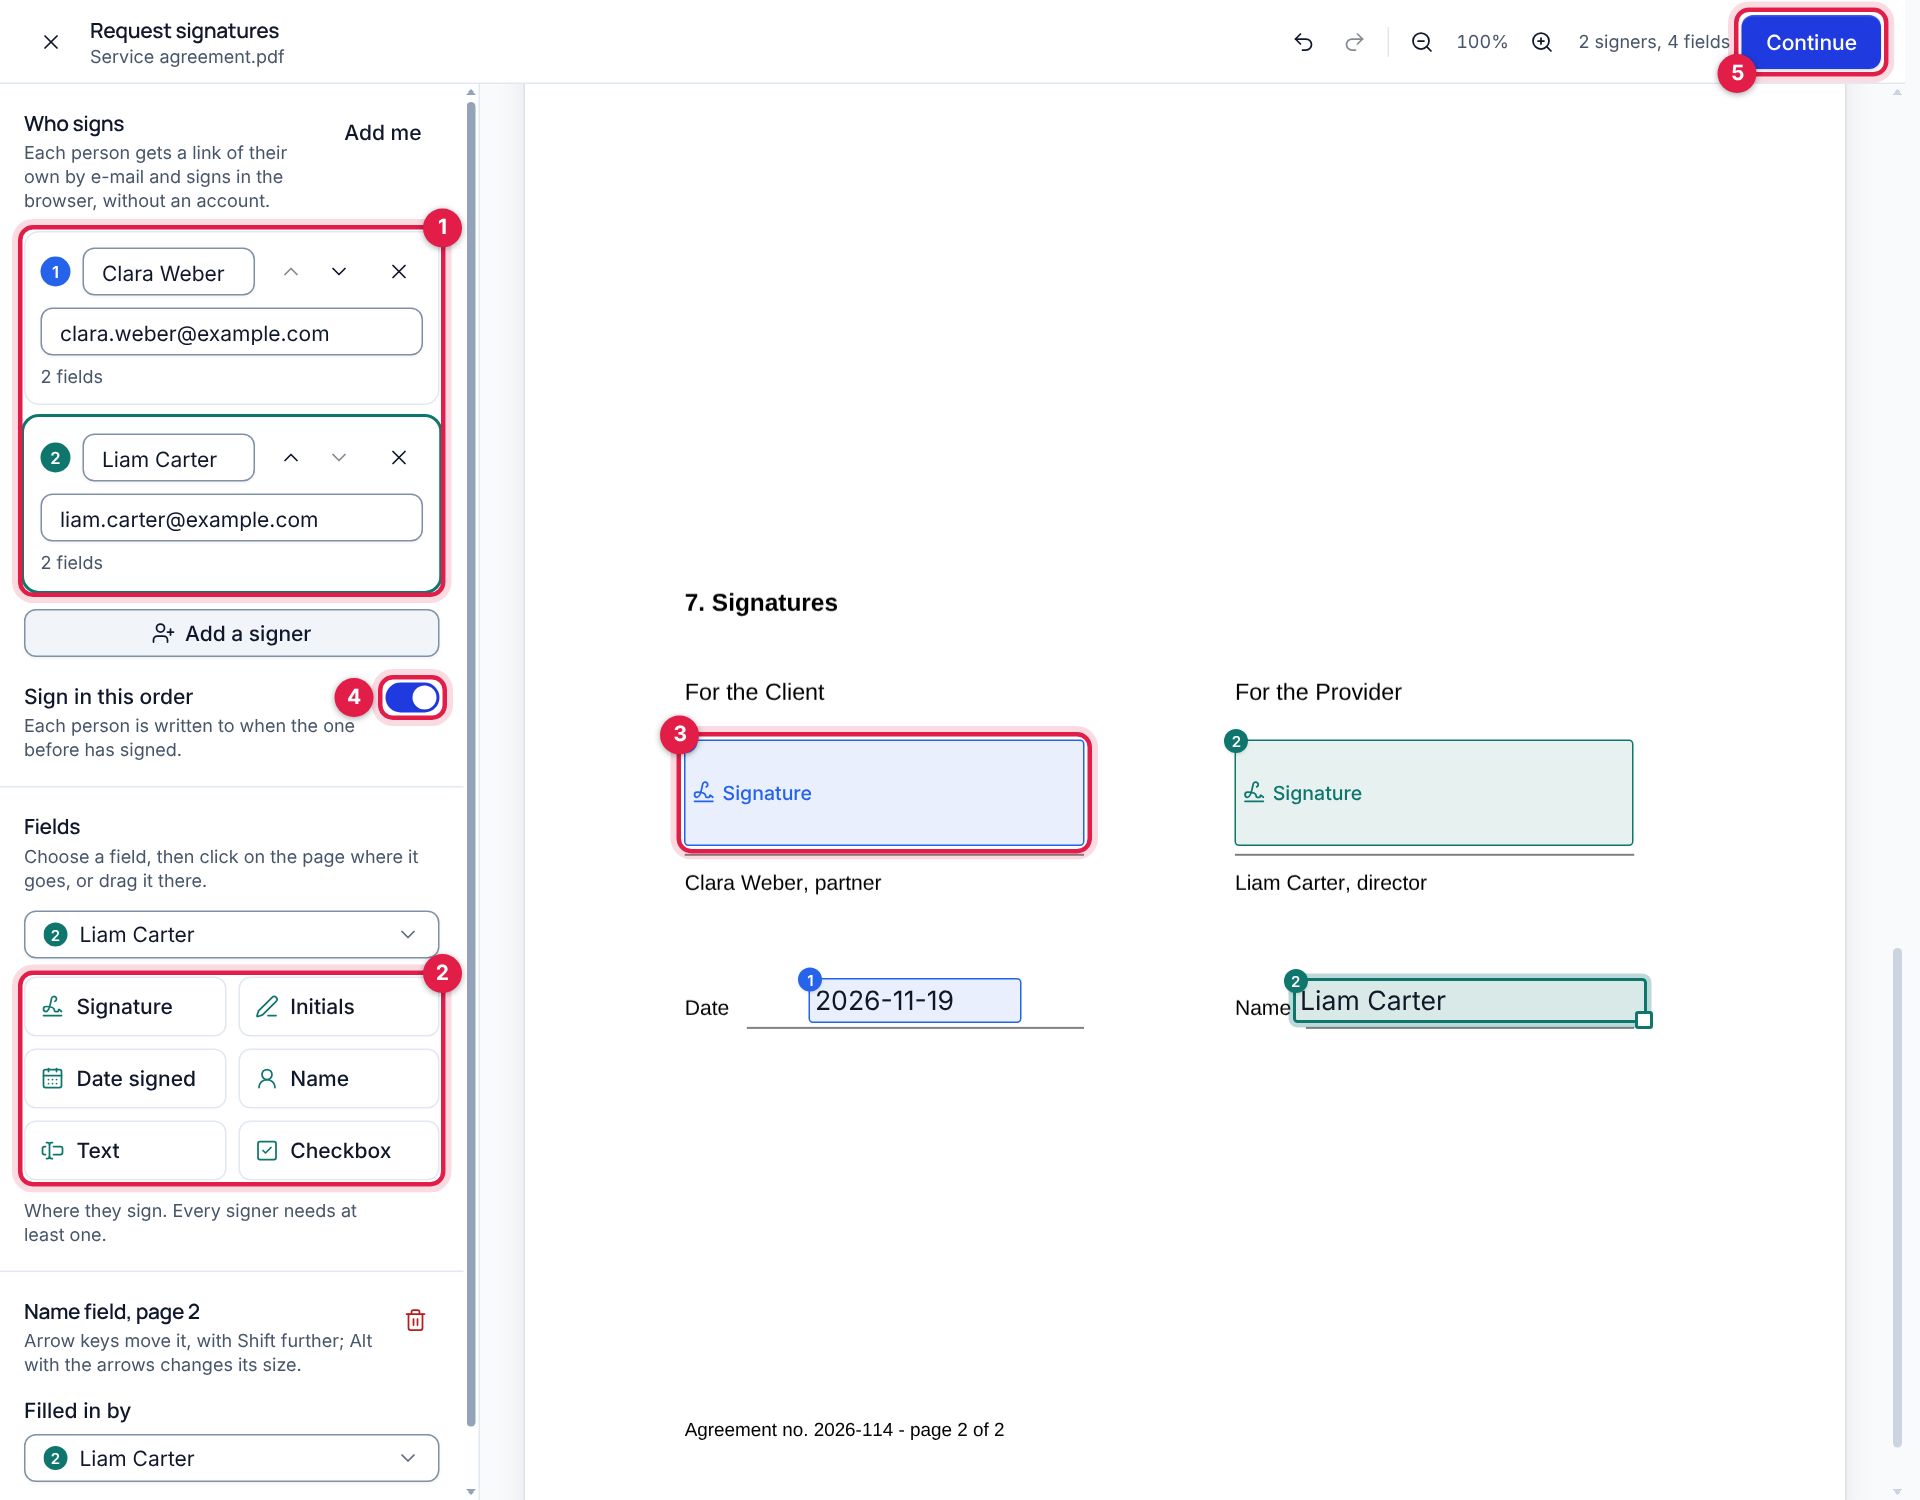
On the left, under Who signs, type the name and e-mail address of the first person (1 in the picture below). For each further person choose Add a signer.
If the order matters — your client first, then your director — turn on Sign in this order (4): each person is written to only when the one before has signed. Without it, everybody gets the link at once and signs when they like.
Step 3: Place the fields
Choose a signer in the list, then a field under Fields (2), and click on the page where it goes (3), or drag it there:
- Signature — where they sign. Every signer needs at least one.
- Initials — for instance at the foot of each page.
- Date signed — written in by the server on the day they sign.
- Name — their name as you typed it; they can correct it.
- Text — a line they type: a place, a job title, a number.
- Checkbox — a box they tick, for instance to confirm they read an annex.
Each field has the colour and the number of its signer. Select a field to move it, resize it, make it optional, or say what to type in it. When every signer has a signature, choose Continue (5).
Step 4: Write the message and send
The last screen sets how the request goes out:
- Title — the subject of the e-mail and the name of the request in your list.
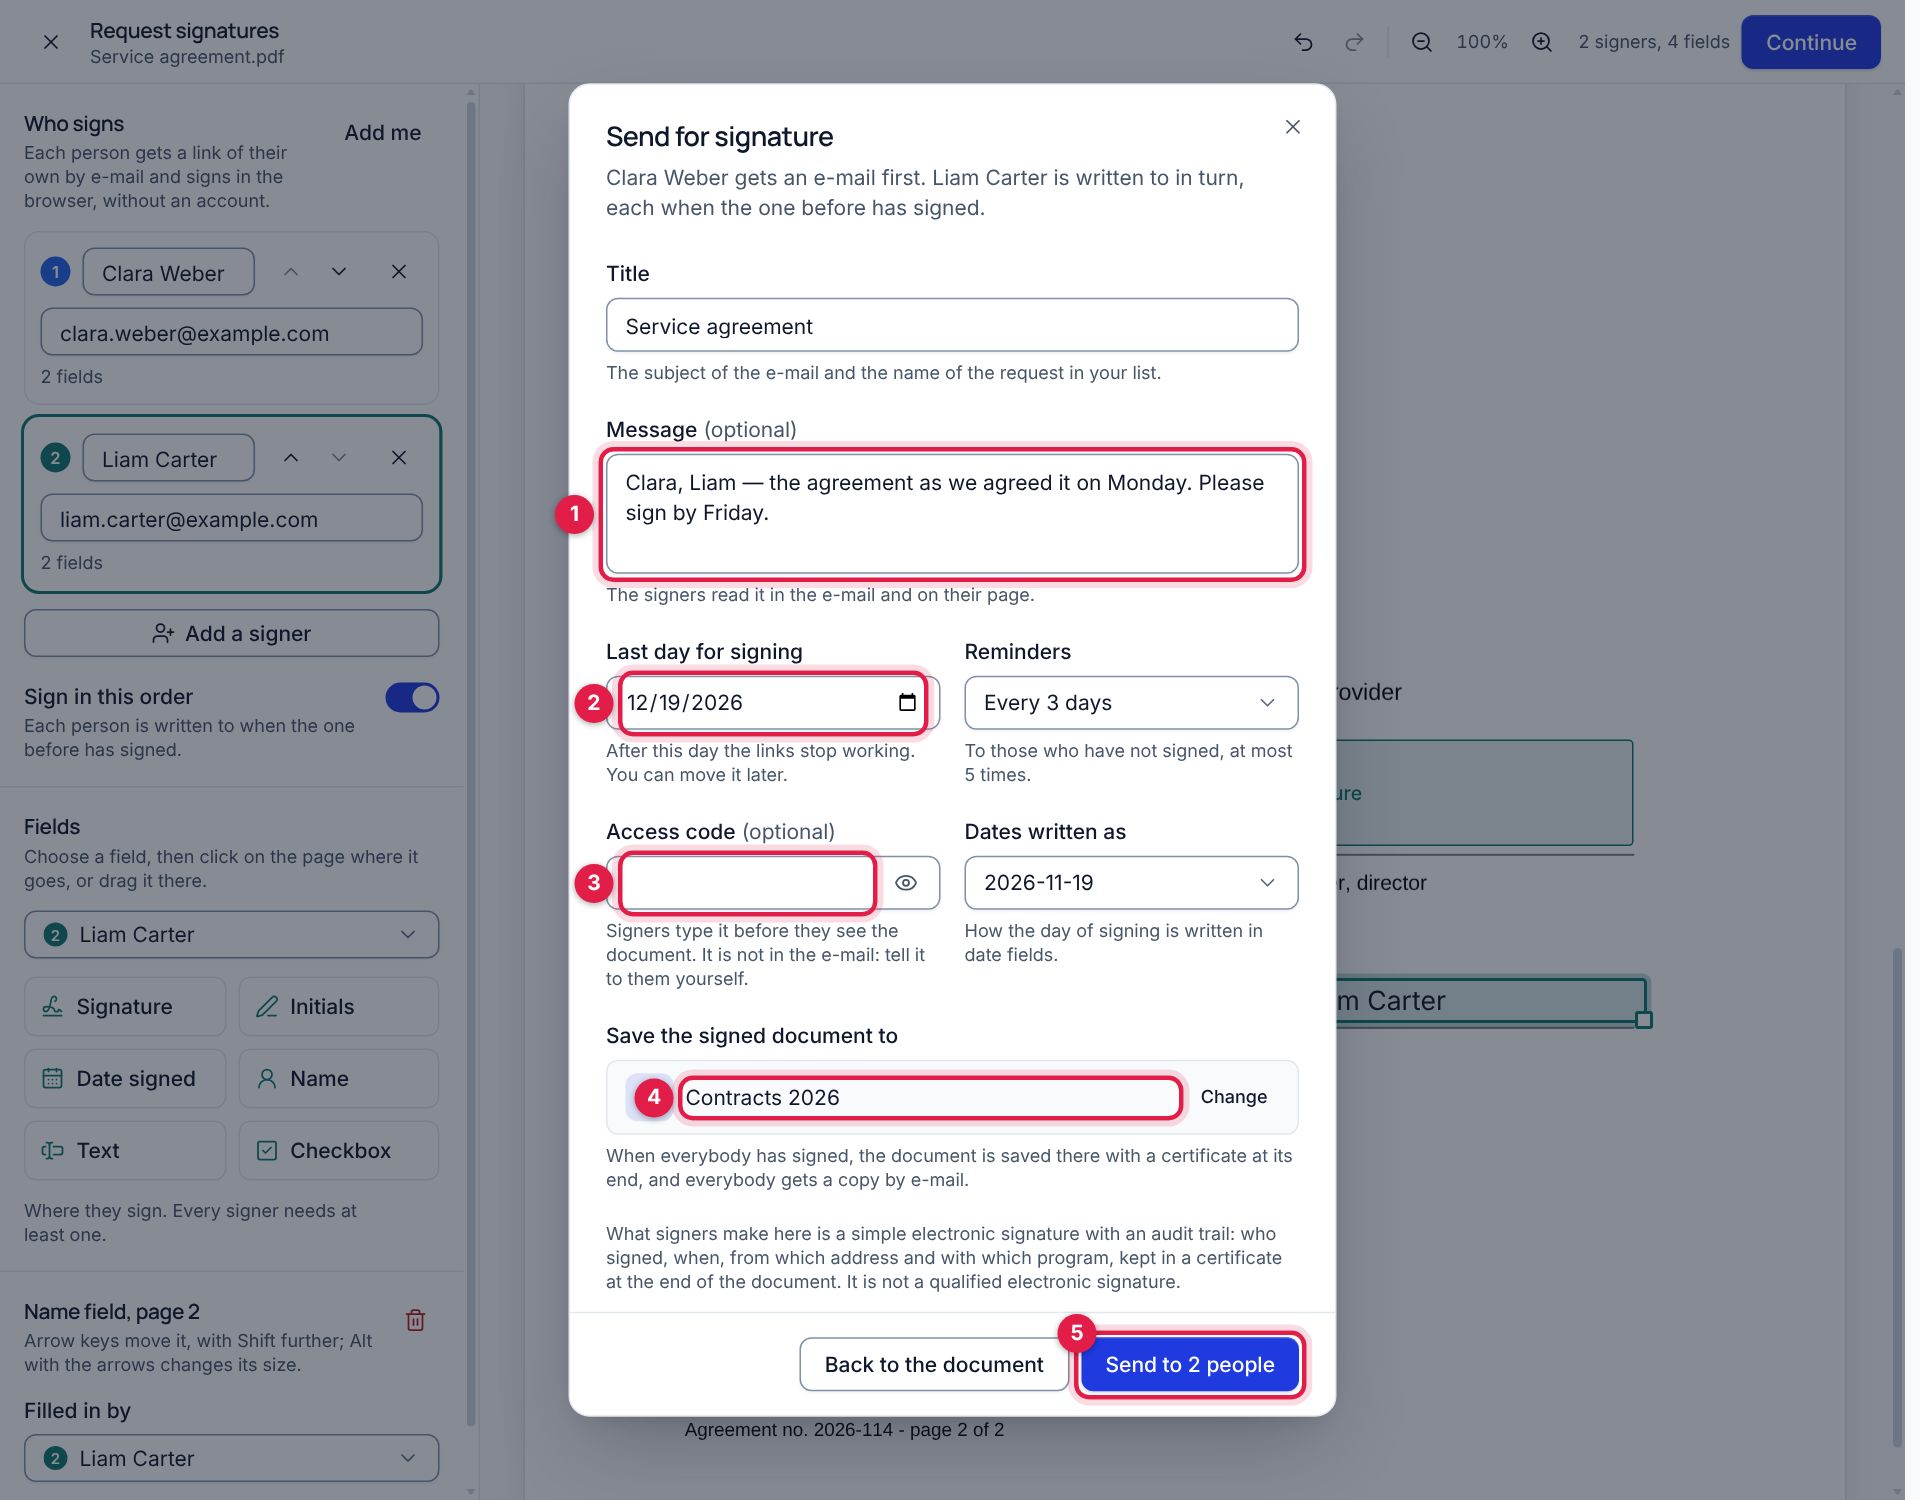
- Message (1) — the signers read it in the e-mail and on their page.
- Last day for signing (2) — after it, the links stop working. You can move it later.
- Reminders — written to those who have not signed yet.
- Access code (3) — asked before the document opens. It is not in the e-mail: tell it to the signers yourself, by phone for instance.
- Save the signed document to (4) — the folder the signed copy goes to.
Then send it (5): the button says how many people it goes to.
Step 5: What your signers see
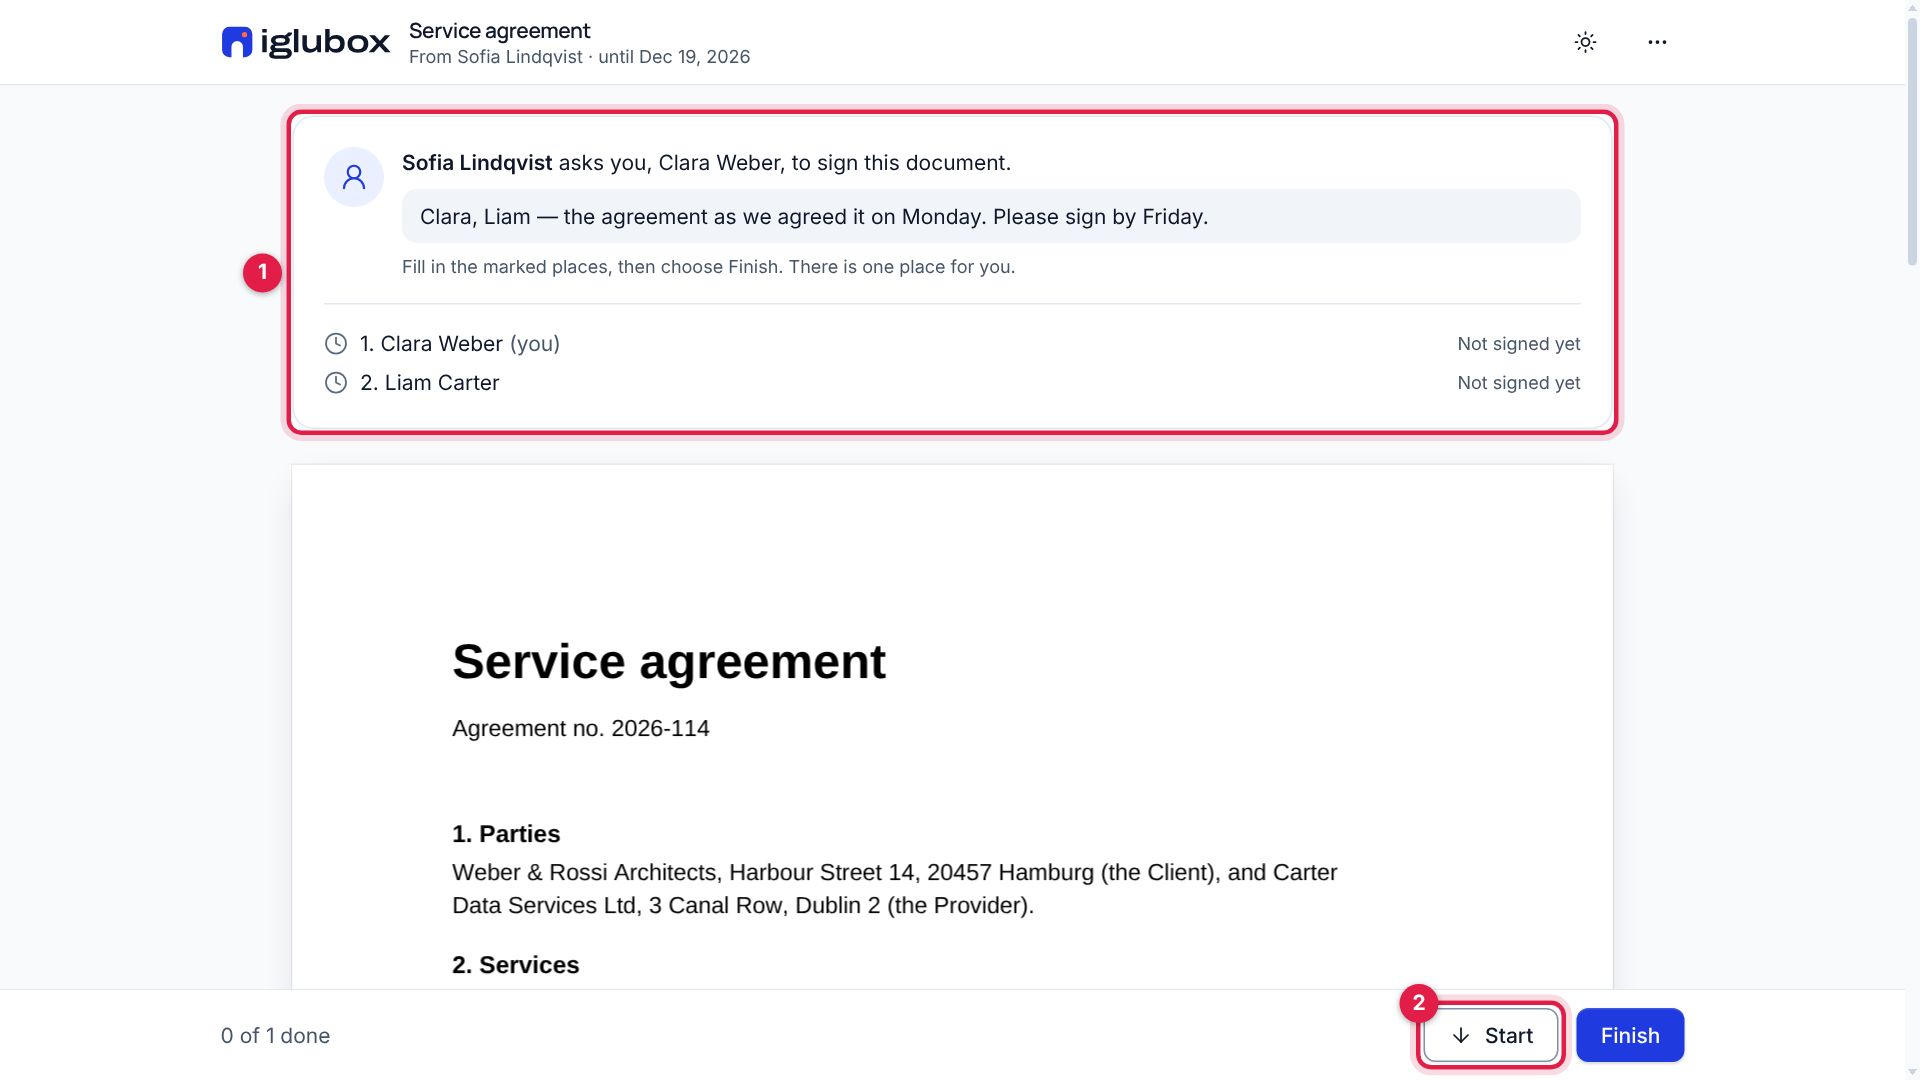
Each signer gets an e-mail with a link of their own. It opens the document in the browser, on a computer or a phone. The page says who asks them to sign (1), and Start (2) takes them to their first field.
A signature can be typed (1), drawn with a finger or the mouse (2), or uploaded as a picture (3). Use this signature (4) puts it in place.
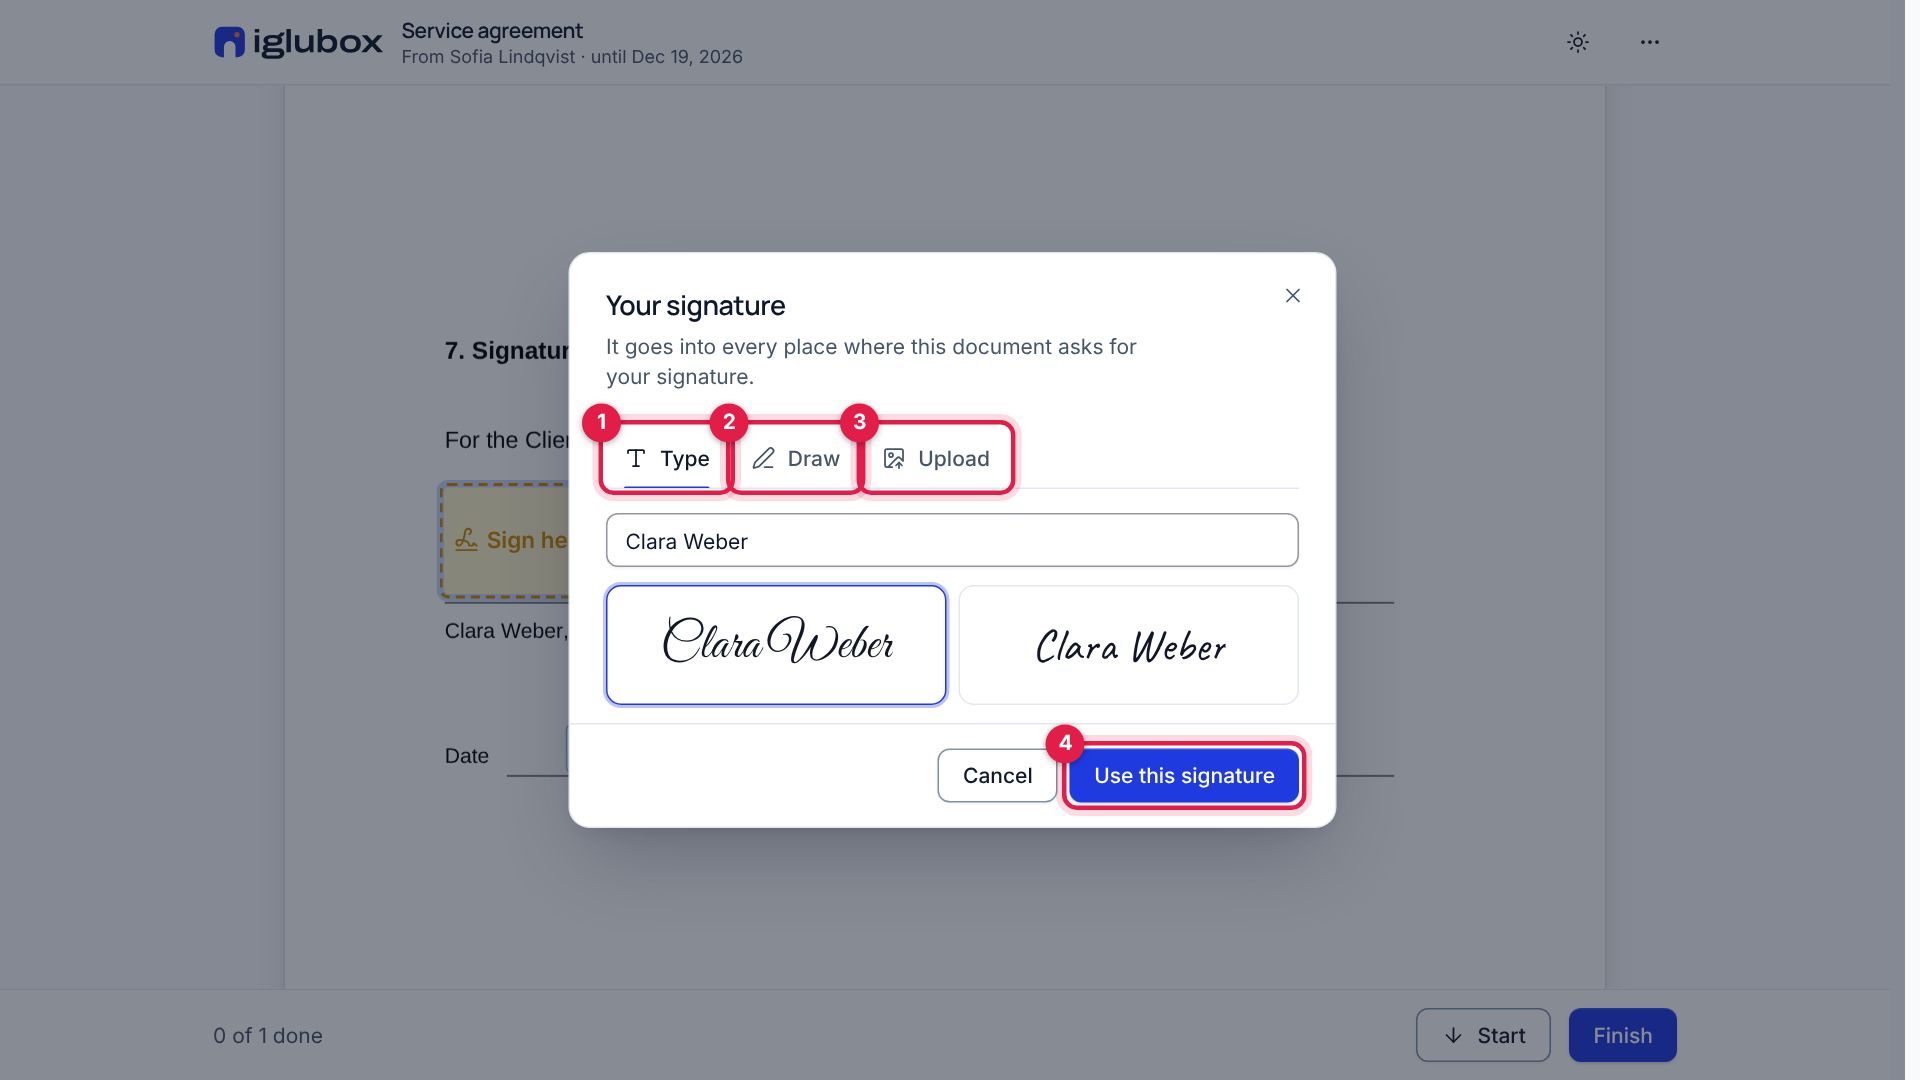
When everything is filled in, they choose Finish, tick that they agree to sign electronically, and choose Sign. A signer who does not agree can decline instead and say why; you are told at once, and the request ends.
Step 6: Follow the request
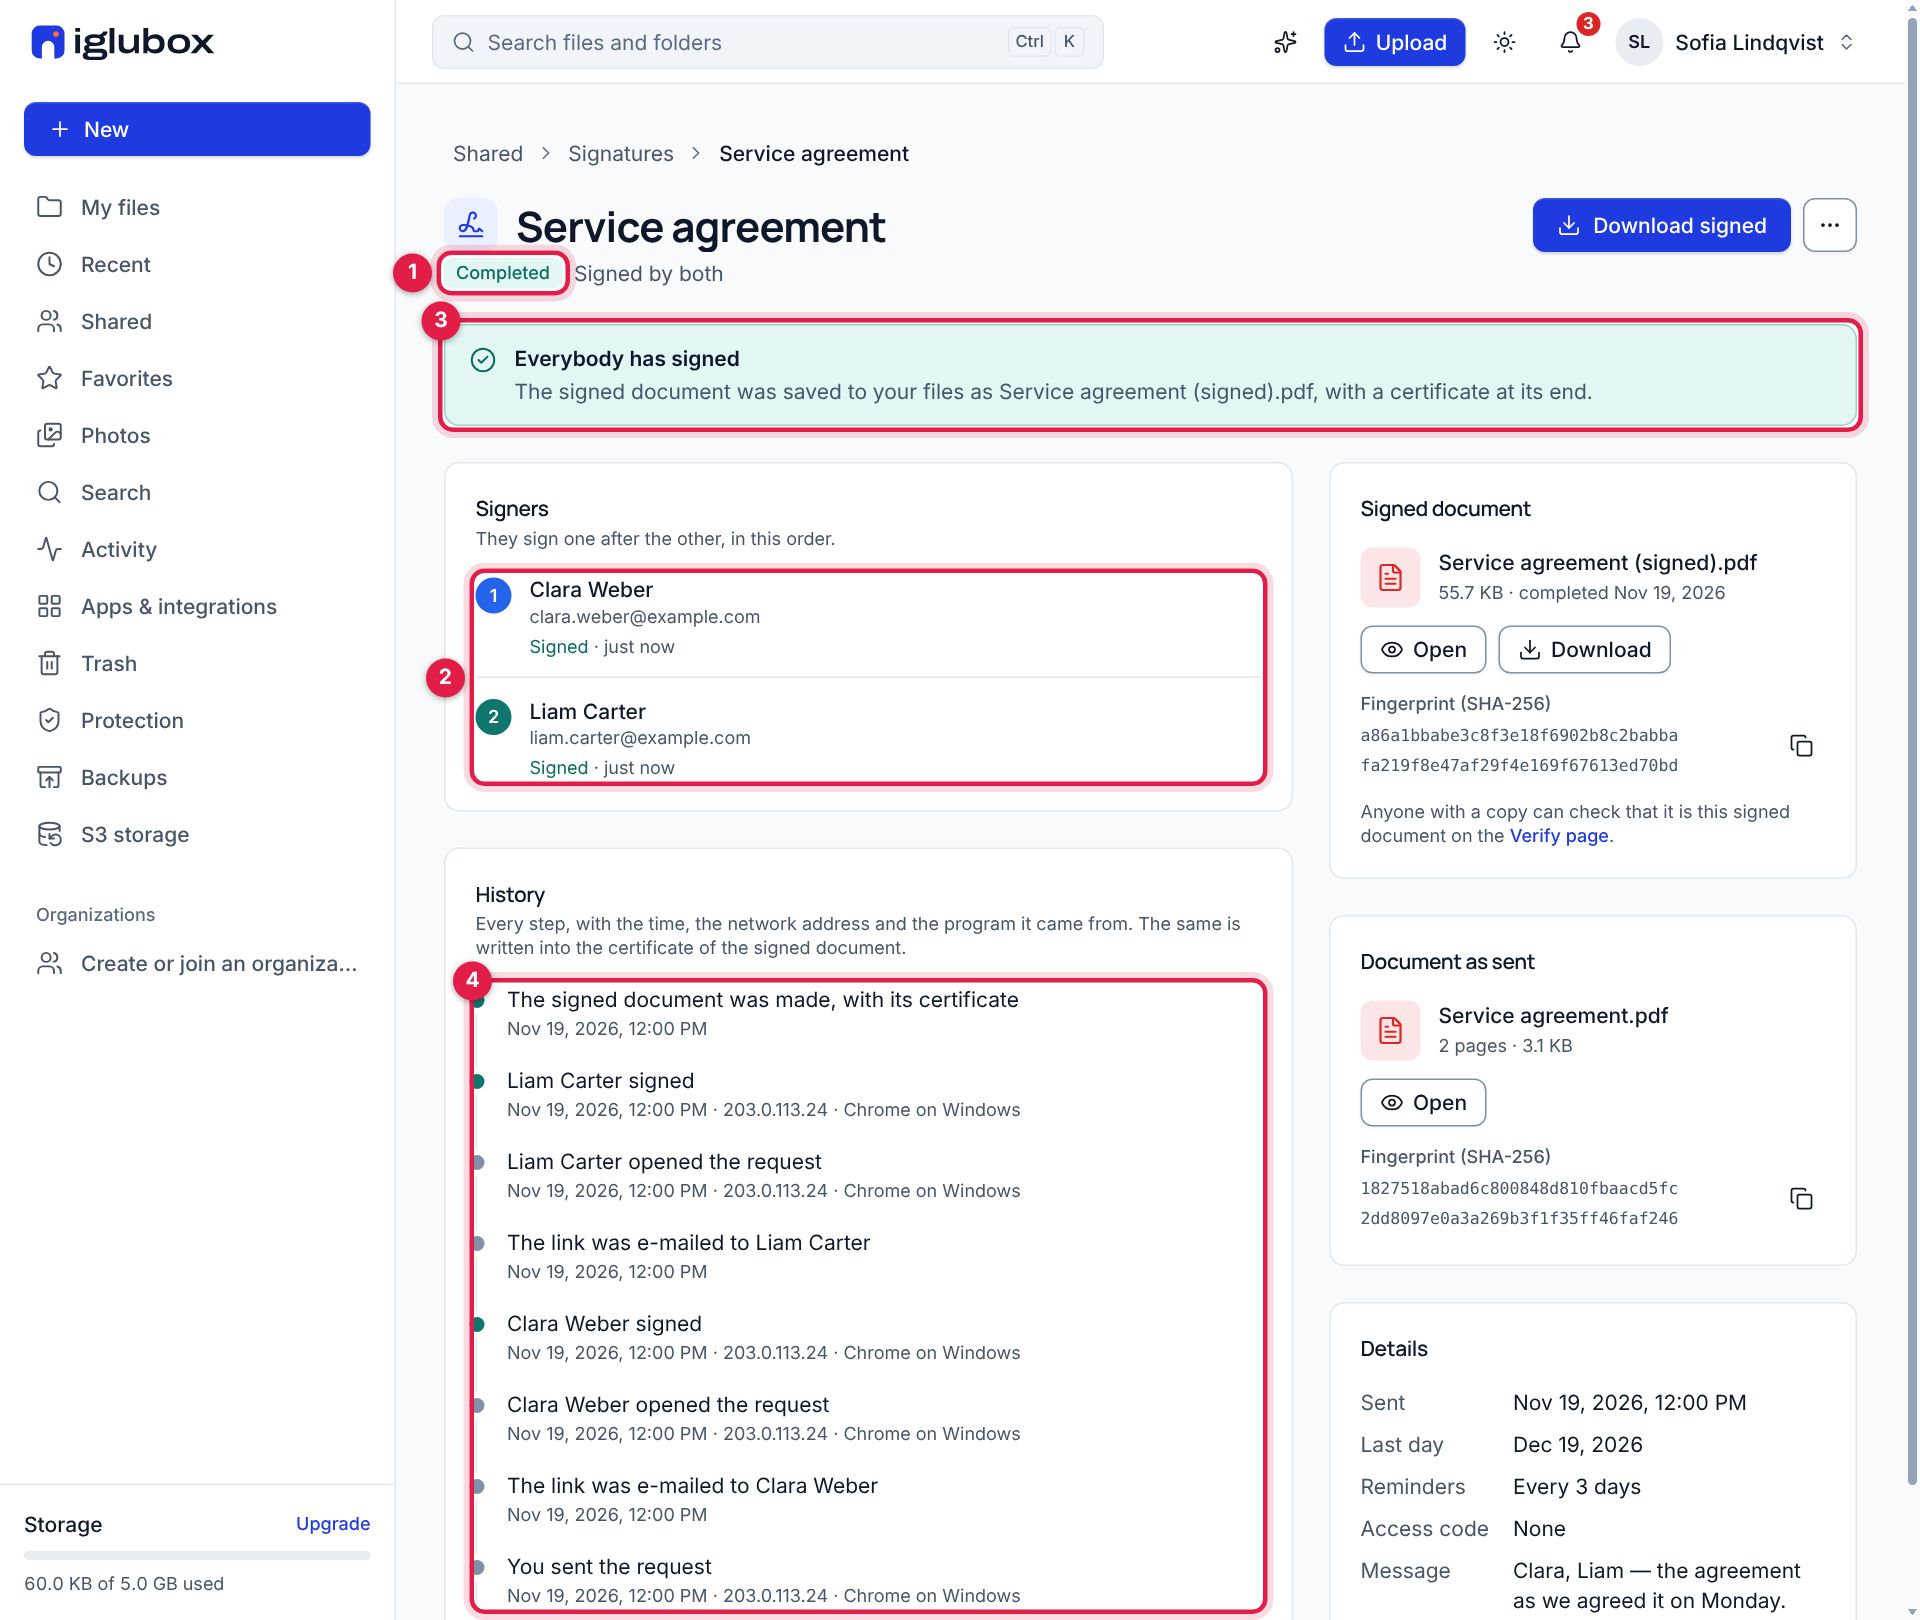
The request has a page of its own, and every request is listed under Shared → Signatures. The page shows its state (1), each signer with what they have done (2), and everything that happened, with times (4).
- Remind writes again to those who have not signed.
- Change, beside a signer, corrects a mistyped address or lets a colleague sign instead.
- More actions changes the last day and the reminders, or withdraws the request.
When the last person has signed, the page says so, and the signed document appears (3).
Step 7: The signed document, and how to check it
The signed PDF is saved in the folder you chose, beside the original — for instance Service agreement (signed).pdf — and everybody who signed gets a link to it by e-mail. Its last pages are the certificate: who signed, when, from which network address, and the fingerprint of the document each of them was shown.
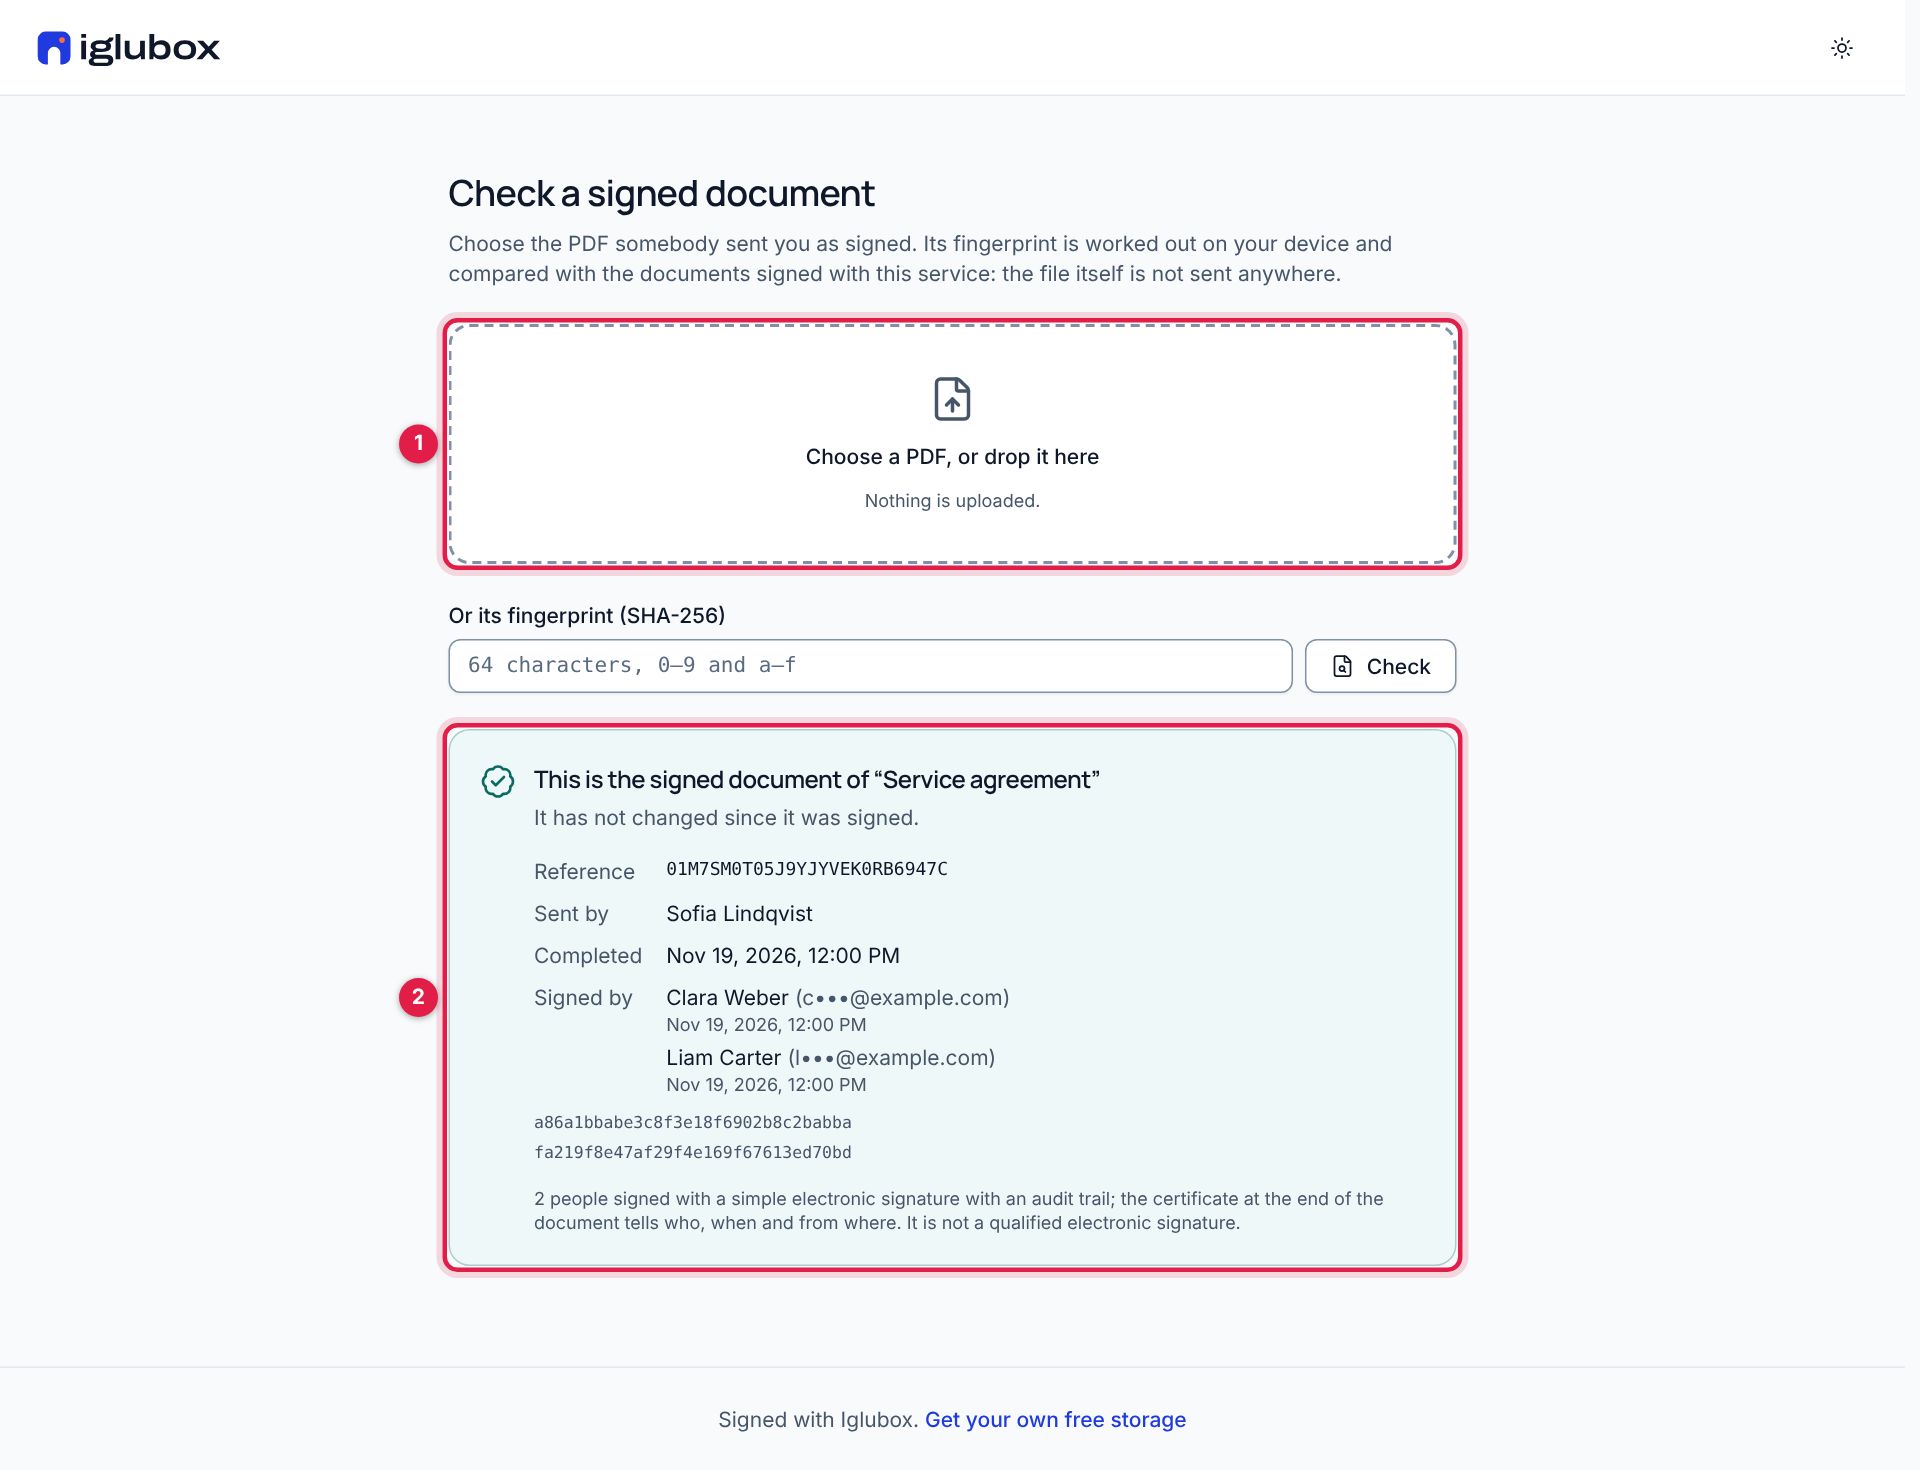
Anyone who has a copy can check it on the Verify page, whose address the certificate prints: drop the file there (1). It is not uploaded — only its fingerprint is sent — and the page says whether it is the signed document of a request, unchanged (2).
Good to know
- What kind of signature it is. A simple electronic signature with a record of every step — not a qualified electronic signature in the sense of eIDAS. Where a document needs a qualified signature, use a qualified trust service.
- The document is kept as it was sent. Changing or deleting the file afterwards does not change what is signed.
- A seal, where the service adds one. Some services also seal the signed documents, so that PDF readers show whether the file was changed afterwards. The certificate pages say whether yours is sealed.
The help center has the short version: send a document for signature.